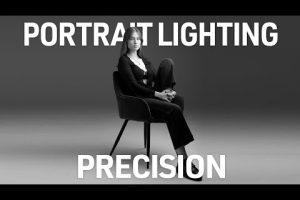



If you’ve ever wondered why some photographs look flat and lifeless while others leap off the screen with depth, dimension, and drama, the answer almost always comes down to one thing: the key light. In photography, the key light serves as the primary and most dominant light source in any given setup. Whether you are shooting portraits in a studio, capturing cinematic landscapes, or working on product photography for an e-commerce brand, understanding how to position, modify, and balance your key light can transform ordinary images into visually compelling stories. This guide dives deep into everything you need to know about key light in photography — from foundational concepts for beginners to advanced techniques that seasoned professionals use to craft stunning, magazine-worthy images.
What Is Key Light in Photography?
The key light definition in photography refers to the principal light source used to illuminate a subject. It is the brightest, most influential light in your setup and establishes the overall mood, direction, and quality of shadows in an image. When photographers discuss their lighting setups, the key light is always the first element they plan and position because everything else — fill lights, rim lights, and reflectors — is designed to complement and shape it.
Think of the key light as the anchor of your entire lighting design. In a three-point lighting setup, which remains the gold standard for portrait and video production, the key light sits at the center of the configuration. Without it, you have no dominant direction of light, and your image loses the visual hierarchy that draws the viewer’s eye.
Why the Key Light Matters for Your Photography
Understanding the importance of the key light goes beyond simply knowing it is the brightest source. The way you use it directly controls several critical aspects of your final image:
- Shadow direction and depth: The position of your key light determines where shadows fall across your subject’s face or form, creating dimensionality.
- Mood and emotion: A high-angle key light creates dramatic, cinematic shadows, while a soft, frontal key light produces a more flattering and approachable feel.
- Texture and detail: Hard key light reveals skin texture and surface details, while soft key light wraps gently around forms for a smoother look.
- Subject separation: By controlling the contrast between the key light and surrounding shadows, you can isolate your subject from the background with precision.
Hard Key Light vs Soft Key Light
One of the most important distinctions photographers make is between hard and soft key light. Hard key light comes from a small, undiffused source — such as a bare speedlight or a bare bulb — and produces sharp, well-defined shadows with high contrast. Soft key light, on the other hand, is created by passing the light through a modifier like an umbrella, softbox, or diffuser, resulting in broader, gradual shadow transitions that are far more forgiving on skin and texture.
How to Position Your Key Light for Different Effects
Placement is where the real creative magic happens. The angle, height, and distance of your key light relative to the subject will dramatically alter the look and feel of your photograph. Here are some of the most widely used key light positions and the effects they produce:
- Loop Lighting — 30 to 45 degrees off-axis: This classic portrait lighting pattern creates a small, loop-shaped shadow on the nose that extends toward the cheek. It is one of the most universally flattering setups for headshots and editorial portraits.
- Rembrandt Lighting — 45 degrees off-axis and elevated: Named after the Dutch master painter, this technique produces a characteristic triangle of light on the shadowed cheek. It adds mood, depth, and a timeless quality to portraits.
- Butterfly Lighting — Directly above the camera: Also called glamour lighting, this position places the key light above and slightly in front of the subject, creating a butterfly-shaped shadow under the nose. It is widely used in beauty and fashion photography.
- Split Lighting — 90 degrees to the side: The key light hits exactly half of the subject’s face while the other half falls into shadow. This creates a dramatic, high-contrast look that is perfect for moody or artistic portraits.
- Broad Lighting — Subject faces slightly toward the key light: This setup illuminates the broader side of the face and is often used to make narrow faces appear wider.
- Short Lighting — Subject faces away from the key light: The shadow side of the face is turned toward the camera, making the face appear slimmer and more sculpted.
Distance and Intensity Considerations

Moving your key light closer to the subject increases the intensity of the light on the subject and also increases the softness of the light due to the relative size of the source. Conversely, pulling the key light farther away makes it harsher and more directional. The inverse square law governs this relationship — light intensity falls off rapidly as distance increases — so even small adjustments in position can significantly change your exposure and shadow quality.
Key Light vs Fill Light vs Rim Light: The Three-Point Lighting Breakdown
To truly understand the role of the key light, it helps to compare it against the other two standard lights in a professional setup. The table below breaks down how each light source functions and contributes to the final image:
| Light Source | Primary Role | Positioning | Effect |
| Key Light | Dominant illumination of the subject | Front or side of the subject, at varying angles | Establishes mood, direction, and shadow structure |
| Fill Light | Reduces harsh shadows created by the key light | Opposite side of the key light, at lower intensity | Controls contrast ratio and softens the overall look |
| Rim Light | Separates the subject from the background | Behind the subject, aimed at the edges | Creates a glowing edge or outline for depth and separation |
The fill light and rim light are secondary to the key light, but they are essential for balancing the image. Without a fill light, a side-positioned key light can create unflattering, pitch-black shadows. Without a rim light, the subject may blend into a similarly toned background, losing the three-dimensional pop that separates a professional image from an amateur one.

Advanced Key Light Techniques for Experienced Photographers
Once you have mastered the fundamentals of key light positioning and modification, you can explore advanced techniques that push your creative boundaries:
Using Grids and Snoots for Precision
A grid or snoot attached to your key light modifier narrows the beam and restricts spill light. This allows you to illuminate your subject with surgical precision while keeping the background dark and uncontaminated. This technique is incredibly popular in beauty, food, and product photography where you want every watt of light directed exactly where you need it.
Chiaroscuro and High-Contrast Key Lighting
Borrowed from Renaissance painting, chiaroscuro refers to the dramatic interplay between light and shadow. In photography, this means using a powerful key light with minimal or no fill light, allowing deep shadows to dominate the frame. The result is images rich in atmosphere, mystery, and visual tension — perfect for fine art portraits and editorial work.
Modifiers That Transform Your Key Light
The modifier you choose for your key light is just as important as its position. Here are the most effective options and what they do:
- Softbox: Creates a large, even source of soft, directional light ideal for portraits.
- Umbrella: Produces a broader, more diffused spread that works well for group shots and full-body portraits.
- Beauty Dish: Delivers a unique blend of soft and specular light that enhances skin glow and texture simultaneously.
- Parabolic Reflector: Offers a focused yet soft spread with beautiful falloff, favored in fashion and commercial work.
Expert Tips for Mastering Key Light Photography
Even after you understand the theory, practice and deliberate experimentation are what turn knowledge into skill. Here are some tips from working professionals that will accelerate your growth:
- Start with one light only. Resist the urge to add multiple sources immediately. Master the key light in isolation before introducing fill or accent lights. This forces you to understand how placement, distance, and angle affect the final image.
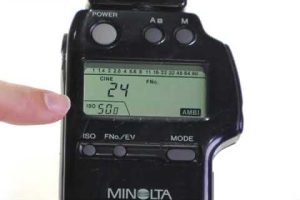
- Use a light meter or histogram. Guessing exposure from the camera screen is unreliable, especially with high-contrast lighting. A handheld incident meter gives you precise readings on your key light ratio, ensuring consistent results across shoots.
- Pay attention to the catchlight. The reflection of your key light in your subject’s eyes — known as the catchlight — adds life and sparkle to portraits. The shape and size of the catchlight changes depending on your modifier, so choose one that flatters the eyes.
- Experiment with colored gels. Adding a subtle color gel to your key light can completely change the mood of an image. Warm gels create a golden-hour feel, while cool gels evoke a clinical or futuristic atmosphere.
- Shoot tethered when possible. Viewing your images on a large monitor in real time allows you to see the exact effect of your key light adjustments instantly, dramatically speeding up your learning curve.
Frequently Asked Questions
What is the difference between key light and main light in photography?
The terms key light and main light are often used interchangeably, but technically, the key light refers specifically to the dominant light source in a setup, while the main light can sometimes refer to the overall primary source in a broader lighting design. In most practical photography scenarios, they mean the same thing — the brightest and most influential light shaping the image.
Where should the key light be placed for flattering portrait photography?
For most flattering portrait results, position the key light at roughly a 30 to 45-degree angle to one side of the subject and slightly above eye level. This creates natural, dimensionally pleasing shadows that sculpt the face without creating unflattering dark areas under the eyes or chin.
Can you use the sun as a key light in outdoor photography?
Absolutely. The sun is one of the most powerful key lights available to any photographer. When shooting outdoors, the sun acts as your natural key light, and you can shape it further using reflectors, diffusers, or even scrims to control harshness and direction. Golden hour sunlight, in particular, makes for exceptionally warm and dramatic key light portraits.
How do I balance my key light with ambient light?
Balancing key light with ambient light requires controlling your camera settings — particularly shutter speed and aperture — while adjusting the power of your artificial key light. A useful technique is to set your ambient exposure first, then add and power up the key light to achieve the desired ratio. This ensures the key light complements the existing light rather than fighting it.
What is the ideal key-to-fill ratio for portraits?
A 2:1 to 3:1 key-to-fill ratio is generally considered ideal for flattering portraits, providing enough shadow to add dimension without creating overly dark areas. More dramatic portraits may use a 4:1 or higher ratio, while beauty and glamour photography often favors a softer 1.5:1 ratio for a luminous, high-key look.
Final Thoughts
The key light is far more than just the brightest bulb in your studio — it is the creative heartbeat of every photograph you light intentionally. Whether you are a beginner learning the fundamentals of portrait lighting or an experienced photographer refining a signature style, mastering the key light gives you the power to control mood, depth, texture, and emotion in every frame you create. Start by experimenting with a single light source, explore different angles and modifiers, and gradually layer in fill and rim lights as your confidence grows. With deliberate practice and a solid understanding of how key light shapes your subject, you will see a remarkable difference in the quality and impact of your photography almost immediately.