


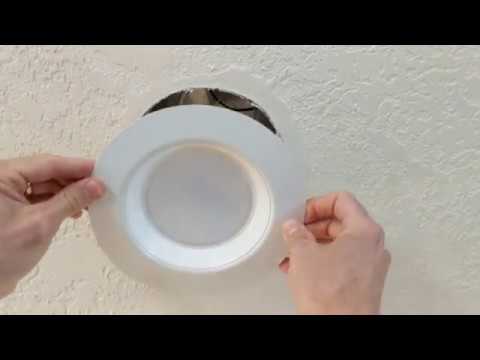
If you are renovating your home or upgrading your lighting setup, you have likely come across the term ceiling can lights. These versatile fixtures are among the most popular choices for modern interiors, and for good reason. Ceiling can lights offer a clean, flush look that enhances any room without taking up valuable headspace. Whether you are illuminating a cozy kitchen, a stylish living room, or a professional office space, understanding how ceiling can lights work, what types are available, and how to install them correctly can make all the difference in achieving the perfect ambiance. This comprehensive guide covers everything you need to know about ceiling can lights — from basic definitions to advanced installation tips and expert recommendations.
What Are Ceiling Can Lights?
Ceiling can lights, also commonly referred to as recessed can lights or recessed downlights, are light fixtures that are installed into a hollow opening in the ceiling. The fixture sits inside the ceiling cavity, with only the trim and bulb visible from below. The “can” refers to the cylindrical housing that holds the electrical components, the bulb, and the mounting hardware. These fixtures are designed to blend seamlessly into the ceiling surface, creating a sleek, minimalist appearance that has made them a staple in contemporary interior design.
Unlike surface-mounted light fixtures that protrude from the ceiling, ceiling can lights sit flush with or below the ceiling plane. This recessed design allows for directional lighting, meaning you can aim the light exactly where you need it. The result is a clean, uninterrupted look that works beautifully in both residential and commercial settings.
Ceiling can lights are available in a wide range of sizes, typically measured in inches. The most common sizes include 4-inch, 5-inch, and 6-inch diameter housings. Smaller sizes are ideal for accent lighting and tight spaces, while larger sizes provide broader illumination and work well in higher-ceilinged rooms.
Types of Ceiling Can Lights
Not all ceiling can lights are created equal. Understanding the different types available on the market will help you make an informed decision based on your specific lighting needs, ceiling type, and design preferences.
New Construction vs. Remodel Can Lights
One of the most important distinctions when shopping for ceiling can lights is between new construction and remodel fixtures.
- New Construction Can Lights: These are designed to be installed before drywall or ceiling material is put in place. They attach directly to the ceiling joists or rafters and are ideal for new building projects or major renovations where the ceiling is open.
- Remodel Can Lights: These fixtures are designed for installations where the ceiling is already finished. They use an adjustable clamping system that expands inside the ceiling cavity to hold the fixture securely in place without needing access to joists.
IC-Rated vs. Non-IC-Rated
If you plan to install ceiling can lights in an insulated attic space, you need to understand the critical difference between IC-rated (Insulation Contact) and non-IC-rated fixtures.
- IC-Rated Ceiling Can Lights: These fixtures are designed to be in direct contact with insulation. They have built-in thermal protection that prevents overheating. IC-rated lights are required by building code in most jurisdictions when the fixture is covered by insulation.
- Non-IC-Rated Ceiling Can Lights: These fixtures must maintain a minimum clearance of three inches from any insulation material. They are generally less expensive but offer less flexibility in installation.
Airtight vs. Non-Airtight
Airtight ceiling can lights are sealed to prevent air leakage between conditioned and unconditioned spaces. In energy-efficient homes, airtight fixtures help reduce heating and cooling costs by minimizing drafts and thermal bridging through the ceiling plane.
Dimmable vs. Non-Dimmable
Many modern ceiling can lights come with dimmable capabilities, allowing you to adjust brightness levels to suit different moods and activities. For the best results, pair dimmable fixtures with compatible LED bulbs and a quality dimmer switch.
How to Choose the Right Ceiling Can Lights
Selecting the perfect ceiling can lights for your space involves considering several key factors. Here is a practical guide to help you choose wisely.
- Determine Your Room Size and Ceiling Height: Larger rooms with higher ceilings benefit from bigger fixtures (6-inch or larger), while smaller rooms and lower ceilings work best with 4-inch or 5-inch can lights.
- Consider the Purpose of the Lighting: Are you looking for general ambient lighting, task lighting for a kitchen island, or accent lighting to highlight artwork? Different purposes require different beam angles and bulb types.
- Choose the Right Bulb Type: LED bulbs are the most energy-efficient and longest-lasting option for ceiling can lights today. They come in various color temperatures — warm white (2700K) for cozy spaces, neutral white (3000K) for kitchens and bathrooms, and cool white (4000K) for task-oriented areas.
- Check the Dimming Compatibility: Not all LED bulbs and dimmer switches work well together. Look for fixtures and bulbs that are explicitly labeled as dimmable and compatible with your chosen dimmer type.
- Verify the Housing Rating: Always check whether the fixture is IC-rated if it will be in contact with insulation, and confirm it meets local building codes and electrical regulations.
Ceiling Can Lights vs. Other Recessed Lighting Options
While “ceiling can lights” is often used interchangeably with “recessed lights,” there are subtle differences in design and application. The table below compares ceiling can lights with other popular recessed lighting options.
| Feature | Ceiling Can Lights | Compact Recessed Lights | Shower Recessed Lights |
| Housing Style | Cylindrical metal can | Shallow-profile housing | Sealed, moisture-resistant housing |
| Typical Size | 4″ to 6″ diameter | 3″ to 5″ diameter | 4″ to 6″ diameter |
| Installation | New construction or remodel | Remodel or new construction | Remodel only (wet locations) |
| IC Rating Available | Yes | Yes | No (sealed design) |
| Best Use | General, ambient, task lighting | Low-ceiling spaces, tight cavities | Bathrooms, showers, outdoor areas |
| Price Range | Moderate to high | Low to moderate | Moderate to high |

What sets ceiling can lights apart from compact recessed lights is their deeper housing cavity, which provides better heat dissipation and allows for a wider range of bulb sizes and types. Shower recessed lights, on the other hand, are specifically rated for damp or wet locations and feature sealed gaskets to prevent moisture intrusion.
Ceiling Can Lights Installation Guide
Installing ceiling can lights is a project that many homeowners can tackle with basic DIY skills and the right tools. However, because this work involves electrical wiring, safety must always come first.

What You Will Need
- Ceiling can light fixtures (housing, trim, and bulb)
- Drill with a hole saw bit (matching fixture size)
- Stud finder and flashlight
- Wire stripper, screwdriver, and pliers
- Non-contact voltage tester
- Ladder and safety glasses
- Electrical tape and wire nuts
Step-by-Step Installation
- Plan the Layout: Use a layout calculator or the rule of spacing — divide the ceiling height by two to determine the distance between each fixture. For a 10-foot ceiling, fixtures should be spaced approximately 5 feet apart.
- Mark the Ceiling: Use a tape measure and pencil to mark the exact locations for each hole.
- Cut the Holes: With the power off and the circuit breaker switched off at the panel, drill pilot holes and use the hole saw to cut openings in the ceiling drywall.
- Run the Electrical Wiring: Pull Romex cable from your electrical panel to each fixture location, connecting wires at junction boxes as needed.
- Install the Housing: For new construction fixtures, attach the mounting bracket to the joists. For remodel fixtures, insert the housing into the ceiling cavity and expand the clamps to secure it.
- Connect the Wiring: Match black to black (hot), white to white (neutral), and green or bare to the ground wire. Use wire nuts and electrical tape for secure connections.
- Attach the Trim and Bulb: Snap or screw the trim ring into place, insert the LED bulb, and restore power at the breaker.
Safety Tip: If you are uncomfortable working with electrical wiring, always hire a licensed electrician. Improper installation can create fire hazards or violate local building codes.
Expert Tips for Maximizing Ceiling Can Light Performance
Getting the most out of your ceiling can lights goes beyond simply installing them correctly. Here are expert-level tips that elevate your lighting design:
- Layer Your Lighting: Combine ceiling can lights with wall sconces, pendant fixtures, and accent lights to create depth and dimension in any room.
- Use Trim to Your Advantage: Adjustable trim allows you to direct light toward specific areas, while decorative trims add a design element to an otherwise functional fixture.
- Opt for High CRI Bulbs: A Color Rendering Index (CRI) of 90 or above ensures that colors appear natural and vibrant under your ceiling can lights.
- Avoid Over-Lighting: Too many fixtures in a small space can create harsh, flat lighting. Plan your layout thoughtfully and consider the room’s function.
- Seair-Leak Gaskets: Use foam gaskets or airtight housings to improve energy efficiency and reduce dust and allergens from entering the ceiling cavity.
Frequently Asked Questions About Ceiling Can Lights
What is the standard size for ceiling can lights in residential homes?
The most common sizes for residential ceiling can lights are 4-inch, 5-inch, and 6-inch in diameter. The 5-inch size is widely considered the most versatile, suitable for general ambient lighting in most rooms. Larger 6-inch fixtures are preferred in rooms with high ceilings or where broader light coverage is needed.
Can ceiling can lights be installed in insulated ceilings?
Yes, but only if the fixtures are rated as IC (Insulation Contact). IC-rated ceiling can lights are specifically designed to safely operate in direct contact with insulation without overheating. Non-IC-rated fixtures require a minimum three-inch clearance from insulation and should never be covered by it.
What type of bulb works best in ceiling can lights?
LED bulbs are the best choice for ceiling can lights today. They are energy-efficient, long-lasting, and available in multiple color temperatures and beam angles. Look for LED bulbs with a CRI of 90 or above for the most accurate and pleasing color rendering.
How many ceiling can lights do I need per room?
A common formula is to divide the room’s square footage by the fixture’s wattage equivalent, but a more practical approach is to space fixtures evenly based on ceiling height. For general lighting, divide the ceiling height by two to get the spacing in feet. In a 12×12 room with an 8-foot ceiling, you would typically need 6 to 8 fixtures spaced about 4 feet apart.
Are ceiling can lights dimmable?
Most modern ceiling can lights are available in dimmable versions. However, you need to ensure compatibility between the dimmable fixture, the dimmable LED bulb, and the dimmer switch. Using mismatched components can cause flickering, buzzing, or premature bulb failure.
Conclusion
Ceiling can lights are one of the most practical and aesthetically versatile lighting solutions available for any home or commercial space. From choosing the right housing type and bulb to planning a thoughtful layout and ensuring code-compliant installation, every detail matters in getting the best results. Whether you are a first-time DIYer or a seasoned homeowner looking to refine your lighting design, ceiling can lights offer endless possibilities for creating the perfect atmosphere in every room. Invest in quality fixtures, pair them with high-performance LED bulbs, and enjoy the transformative power of well-planned recessed lighting.