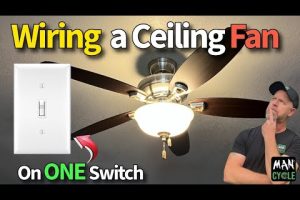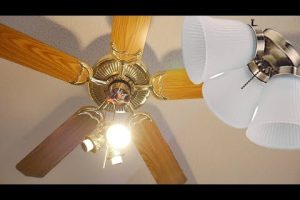



A ceiling fan light kit is one of the most practical and stylish upgrades you can make to any room in your home. Whether you are refreshing an outdated fixture, building a new space from scratch, or simply looking for a way to combine airflow and illumination in a single unit, understanding how light kits work can save you time, money, and frustration. This comprehensive guide dives deep into everything you need to know about ceiling fan light kits, from the different types available on the market to installation best practices, compatibility considerations, and maintenance tips that keep your setup running beautifully for years to come.
What Exactly Is a Ceiling Fan Light Kit?
A ceiling fan light kit refers to the detachable or integrated lighting assembly that attaches to the body of a ceiling fan. In many cases, fans are sold as bare units without any lighting component, and the light kit is purchased separately. This modular approach gives homeowners the flexibility to customize their setup based on room size, decor, and personal brightness preferences. The kit typically includes a light housing, a canopy that conceals the wiring junction, a mounting bracket, and sometimes a pull chain or remote control receiver for operation.
These kits come in a wide range of designs, from sleek modern disc lights to ornate vintage-style chandelier attachments. The bulbs used can vary enormously as well, with options spanning traditional incandescent, halogen, compact fluorescent, and the increasingly popular LED technology. Knowing what is available helps you make an informed decision that balances aesthetics with energy efficiency.
Types of Ceiling Fan Light Kits
Flush Mount Light Kits
Flush mount kits sit directly against the ceiling without any downrod extending from the fan motor housing. They are ideal for rooms with lower ceiling heights, typically eight feet or less. These kits tend to have a compact profile and work well in hallways, closets, and small bedrooms where vertical space is limited. Their streamlined design also makes them a favorite in modern and minimalist interior schemes.
Downrod Mount Light Kits

Downrod mount kits attach to the bottom of the fan motor and hang below the fan blades on a metal rod. They are best suited for rooms with higher ceilings, generally nine feet and above. The added distance between the light source and the ceiling creates a more dramatic illumination effect and allows the light to disperse more evenly throughout the room. Many luxury and transitional-style ceiling fans rely on downrod light kits for a polished, finished look.
Universal vs. Manufacturer-Specific Kits
One critical distinction is between universal light kits and brand-specific kits. Universal kits are designed to fit a broad range of fan models and brands, making them a convenient option when you are unsure of compatibility. Manufacturer-specific kits, on the other hand, are engineered to match a particular fan model perfectly, often providing a cleaner installation and better aesthetic integration. Always check your fan’s model number before purchasing to avoid compatibility issues.
How to Choose the Right Ceiling Fan Light Kit
Selecting the best light kit involves more than picking a design you like at the store. Several technical and aesthetic factors should guide your choice.
- Fan Compatibility: Confirm the kit is compatible with your specific fan model. Measure the mounting bracket and check the manufacturer’s compatibility list.
- Bulb Type and Wattage: Decide between LED, CFL, or incandescent bulbs. LEDs are the most energy-efficient and long-lasting option, often rated for 15,000 to 50,000 hours of use.
- Room Size and Light Output: Match the kit’s lumen output to the room’s square footage. A general rule is 20 to 30 lumens per square foot for living spaces.
- Finish and Style: Choose a finish that complements your existing hardware. Common options include brushed nickel, oil-rubbed bronze, matte black, chrome, and brass.
- Dimmability: If you want mood lighting or the ability to adjust brightness, look for kits labeled as dimmable and pair them with a compatible dimmer switch.
- Installation Complexity: Some kits require professional wiring, while others are designed for straightforward DIY installation. Assess your comfort level with electrical work before committing.
Installing a Ceiling Fan Light Kit
Installing a ceiling fan light kit is a manageable DIY project for most homeowners with basic electrical knowledge. However, safety should always come first. Before starting, turn off the circuit breaker that controls the fan and use a non-contact voltage tester to confirm the power is fully disconnected.
The general process involves removing the fan’s existing canopy, disconnecting the old light kit wiring (if applicable), connecting the new kit’s wires to the fan’s wiring using wire nuts, securing the bracket, and attaching the light housing. Always follow the specific instructions provided with your kit, as wiring configurations can vary between models.

If you are uncomfortable working with electrical connections, it is well worth hiring a licensed electrician. A properly installed light kit ensures both safety and optimal performance, reducing the risk of flickering, buzzing, or electrical hazards over time.
Top Ceiling Fan Light Kit Brands and Feature Comparison
The market offers numerous brands and models, each with unique strengths. The table below compares some of the most popular options to help narrow your search.
| Brand | Kit Type | Bulb Compatibility | Dimmable | Price Range |
| Hunter | Universal & Brand-Specific | LED, CFL, Incandescent | Yes (with compatible dimmer) | $20 – $60 |
| Westinghouse | Universal | LED, CFL | Yes | $15 – $45 |
| Big Ass Fans | Brand-Specific | LED Only | Yes | $80 – $150 |
| Emerson | Universal & Brand-Specific | LED, CFL, Incandescent | Select Models | $25 – $55 |
| Minka-Aire | Brand-Specific | LED, CFL | Yes | $50 – $120 |
When reviewing this comparison, remember that price often reflects build quality, warranty length, and included features such as remote control compatibility and smart home integration. Higher-end kits from brands like Big Ass Fans and Minka-Aire frequently offer sleeker designs, quieter operation, and superior color rendering indexes (CRI), which means the light they produce looks more natural and accurate to the human eye.
Maintenance Tips for Long-Lasting Performance
Once your ceiling fan light kit is installed, regular maintenance will keep it functioning at its best. Dust the light fixture and fan blades weekly using a microfiber cloth or a duster with an extendable handle. For deeper cleaning, remove the light globe or shade and wash it with warm soapy water, allowing it to dry completely before reattaching.
Replace bulbs promptly when they dim or flicker rather than waiting for a complete burn-out, as inconsistent lighting can strain the electrical connections. If you notice flickering or buzzing, check the wire nuts for loose connections and ensure the dimmer switch is compatible with your bulb type. Using non-dimmable bulbs on a dimmer circuit is one of the most common causes of premature bulb failure and light kit malfunction.
Final Thoughts
A ceiling fan light kit is far more than an accessory — it is a strategic investment in your home’s comfort, functionality, and visual appeal. By understanding the different types, prioritizing compatibility, and following proper installation and maintenance practices, you can enjoy a perfectly lit room with efficient airflow year-round. Whether you opt for a budget-friendly universal kit or a premium brand-specific model, the key is to choose a solution that meets your specific needs and enhances the space it serves.
Frequently Asked Questions
Can I add a light kit to a ceiling fan that didn’t come with one?
Yes, in most cases you can add a light kit to a fan that was sold without one. Check your fan’s manual or the manufacturer’s website to confirm that a retrofit light kit is available for your model. Universal kits offer broad compatibility, but matching the brand and model ensures the cleanest installation and best visual result.
What is the difference between a canopy and a light kit?
The canopy is the decorative cover that mounts to the ceiling and hides the electrical junction box and wiring connections. The light kit is the complete lighting assembly, including the housing, bulb sockets, and sometimes the canopy itself. Some kits include a canopy, while others require you to use the fan’s existing canopy.
How do I know if my ceiling fan light kit is dimmable?
Look for the word “dimmable” printed on the kit’s packaging or product description. You will also need a compatible dimmer switch installed at your wall location. Not all dimmer switches work with all bulb types, so verify that your dimmer is rated for LED bulbs if that is what you are using in your light kit.
Are LED ceiling fan light kits worth the extra cost?
Absolutely. LED light kits consume significantly less energy than traditional incandescent or halogen options, lasting up to 25 times longer. Over the lifespan of the kit, the energy savings alone can offset the higher upfront cost. LEDs also produce less heat, which is a significant safety advantage when the fixture is mounted inside a fan motor housing.
How long does it take to install a ceiling fan light kit?
For a straightforward installation, most homeowners can complete the job in 30 to 60 minutes. Complex wiring situations, such as adding a new electrical box or converting a non-light fan to a lit model, may take longer and could benefit from professional assistance.