


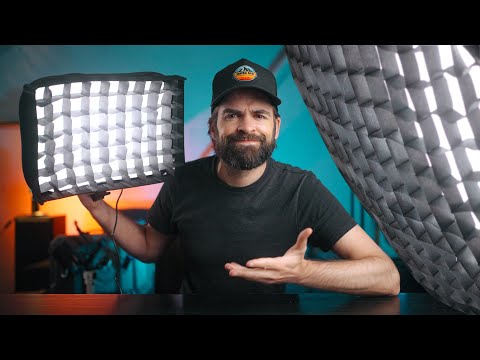
When you step behind the camera, the quality of your final image hinges on one crucial element: light. Many photographers and videographers underestimate the transformative power of the best studio lighting, thinking that a great subject alone will carry the shot. However, without proper illumination, even the most expensive camera gear falls flat. Whether you are capturing a high-fashion portrait, a polished product shot, or a cinematic video frame, your lighting setup dictates the mood, texture, and depth of your work. Navigating the crowded market of photo studio lights can feel overwhelming, but understanding the fundamentals of continuous lighting kits and strobe systems will set you on the right path. This guide breaks down the top contenders, explores the nuances of light shaping, and provides actionable recommendations to elevate your creative workspace.
Why Investing in the Best Studio Lighting Changes Everything
Investing in high-quality lighting is arguably the single most impactful upgrade you can make to your photography or videography workflow. Stepping away from on-camera flashes and natural window light opens up a universe of creative control. The best studio lighting systems give you the power to shape shadows, freeze motion, and control color accuracy with precision. Unlike ambient light, which is subject to the whims of the weather and time of day, professional photo studio lights provide a consistent environment where you dictate every photon hitting your subject. One of the most critical specs to understand when comparing LED panels for photography and strobe units is the Color Rendering Index, or CRI. A high CRI rating ensures that the colors you see in your viewfinder are the colors that appear in your final file, which is essential for skin tones and product photography. Furthermore, investing in a robust lighting setup means your gear adapts to any scenario, from intimate headshots to large commercial sets.
The Core Types of Studio Lighting
Before you buy a single unit, you must understand the two dominant technologies that power modern photography and videography environments. Each system serves distinct purposes and suits different creative workflows.
Continuous Lighting Kits
Continuous lights, often referred to as LED panels for photography, remain on while you shoot. This makes them the gold standard for video creators and beginners who want to see exactly how shadows fall before clicking the shutter. The best studio lighting in this category offers flicker-free technology and adjustable color temperature, allowing you to seamlessly shift from warm tungsten aesthetics to cool daylight looks without swapping gels or filters.
Strobe Lighting for Photography
Strobes, or monolights, emit a powerful burst of light only when triggered by your camera’s flash sync. They excel in pure photography, providing immense power and incredibly short flash durations that freeze fast-moving action with crystal clarity. While they require a bit more trial and error because you cannot see the light until the capture happens, modern strobe lighting for photography often includes modeling lamps. These built-in continuous bulbs allow you to preview the catchlights and shadows before you fire the main flash.

Quick Comparison of Lighting Types:
| Feature | Continuous LED Kits | Strobe Lighting |
| Best For | Video, Beginners, Live Previews | Action Photography, High Power |
| Power Consumption | Low to Moderate | High (Short Bursts) |
| Learning Curve | Gentle | Moderate |
Best Studio Lighting Setups for Every Skill Level
Choosing the right system depends entirely on where you are in your creative journey. What works for a seasoned professional will only frustrate a beginner, while a starter kit will leave an advanced shooter wanting more power and flexibility.
Beginner Studio Lighting: Getting Started Without Breaking the Bank
If you are just starting out, the best studio lighting setup is simple, versatile, and forgiving. Look for a two-light continuous lighting kit that includes softboxes. These kits typically offer variable color temperatures, meaning you can shoot both warm portraits and cool product shots without swapping bulbs. Focus on learning the basics of three-point lighting—using a key light, a fill light, and a backlight—before you invest in complex modifiers.

- Godox SL60W: An affordable, powerful LED light panel perfect for learning the ropes.
- Neewer 660 LED Kit: A budget-friendly duo with bi-color adjustments for versatile shooting.
Intermediate Lighting for Video and Hybrid Shoots
At the intermediate level, you start caring deeply about how light interacts with different surfaces and materials. The best studio lighting for this stage should include adjustable light stands, deep umbrellas, and grid spots to control unwanted light spill. If you are doing hybrid video and photo work, consider a bi-color LED tube light or a high-output panel with top-tier CRI ratings. This allows you to match the ambient light of a location while adding dramatic shadows and depth with professional modifiers. Balancing the key and fill lights becomes your primary focus, and using a light meter will help you achieve consistent exposures across different frames.
Advanced Studio Lighting: Professional Grade Control
For seasoned professionals, the best studio lighting involves sophisticated synchronization, massive power output, and pinpoint accuracy. Advanced strobe lighting for photography often relies on wireless triggers and a central power pack system that distributes juice to multiple heads simultaneously. You will also want to incorporate advanced lighting modifiers like beauty dishes, scrims, and snoots to craft highly specific looks that separate your work from the competition.
Essential Lighting Modifiers and Accessories
Your light source is only half the equation; the modifier is where the actual magic happens. The best studio lighting setups are incomplete without the right tools to shape the beam and control spill. Don’t forget the humble reflector, which is one of the most cost-effective tools in any studio lighting kit. Here is how different photo studio lights modifiers alter your final image:
- Softboxes: Create a broad, diffused light that wraps around subjects beautifully, making them the go-to for portrait and beauty photography.
- Umbrellas: Offer a wide, spread-out light that is excellent for group shots and quick, efficient studio setups.
- Beauty Dishes: Provide a sharp, contrasty light with soft edges, highly favored by fashion and glamour photographers.
- Barn Doors & Snoots: Focus the light into a tight beam, perfect for highlighting a specific product or isolating a subject from the background.
Investing in a quality light meter is also non-negotiable. While your camera’s built-in light meter gives you a baseline, an incident light meter measures the light falling directly on your subject, ensuring consistent exposures across the entire studio environment.
Expert Tips for Shaping Light Like a Pro
Owning the gear is only step one; knowing how to use it is what separates amateurs from masters. Here are some practical recommendations to maximize the potential of your new studio lights.
- Start with a Single Source: Before adding a second light, master the art of a single key light. Move it around your subject and observe how the shadows change direction and length.
- Mind the Throw Distance: The further your light is from the subject, the harder and more focused the light becomes. Pulling a softbox back creates a broader, flatter illumination.
- Use a Fill Card: Not every setup requires a dedicated fill light. A simple white foam board bounces the key light back into the shadow side, saving you the cost and space of a second studio light.
- Check Your CRI: Always aim for a Color Rendering Index above 90. Low CRI lights wash out skin tones and make product colors look dull and unnatural.
Frequently Asked Questions
What is the best studio lighting setup for beginners?
The best studio lighting setup for beginners is a two-light continuous LED kit paired with softboxes. Systems like Godox or Neewer allow new photographers to practice three-point lighting without the steep learning curve of strobes. Continuous lights let you see the shadows and highlights in real-time, making it much easier to understand how light falls on your subject before you capture the frame.
How do I choose the best studio lighting for video?
When choosing the best studio lighting for video, prioritize flicker-free continuous LED panels with adjustable color temperature. Unlike strobes, video lights must stay on throughout the shoot. Look for bi-color LEDs with high CRI and TLCI ratings to ensure that your footage looks natural across different frame rates and shutter speeds without color banding.
Are strobes or continuous lights better for studio photography?
The choice between strobes and continuous lights depends entirely on your workflow. Strobe lighting for photography is better for freezing motion and overpowering sunlight due to its immense power. However, continuous lighting kits are superior for video work and beginners because you can see the lighting effect on your subject before taking the shot.
What lighting modifier should I use with my studio lights?
For portraits, a softbox is the most versatile modifier, creating a flattering, soft light that minimizes harsh skin imperfections. For product photography, a beauty dish provides a crisp, directional look, while a strip box is ideal for highlighting the contours of three-dimensional objects like jewelry or automobiles.
How many watts do I need for studio lighting?
The wattage you need depends on the size of your studio and the type of photography you do. For small home studios doing headshots and portraits, 200 to 400 watts per light is usually sufficient. For large commercial spaces or high-speed photography requiring fast shutter sync, you should look for 600-watt strobes or higher to achieve proper exposure.
Why is CRI important for studio lighting?
CRI, or Color Rendering Index, measures how accurately a light source reproduces the true colors of objects compared to natural sunlight. A high CRI (90+) is crucial because low CRI lights distort skin tones, make white backgrounds look grey or yellow, and render product colors incorrectly. If color accuracy matters to your work, always prioritize the best studio lighting with a CRI rating of 95 or above to ensure professional results.
Finding the best studio lighting is a journey of understanding your creative vision and matching it to the right technology for your specific needs. Whether you opt for a continuous LED panel or a powerful strobe lighting for photography setup, the most important step is simply to start experimenting and shooting. Master the fundamentals of shadow control, invest in quality modifiers, and always prioritize color accuracy above all else. With the right studio lighting kit, you are not just buying equipment—you are investing in the foundation for a career of visually stunning, professional-grade imagery that will stand the test of time.