


Every photographer knows the secret that separates amateur shots from professional-grade images isn’t the camera body or the latest lens — it’s lighting. The best photography lighting setups can transform a flat, lifeless photograph into a dramatic, eye-catching masterpiece. Whether you’re shooting portraits, products, or landscapes, understanding how to shape and control light is the single most impactful skill you can develop. In this guide, we’ll break down the most effective lighting configurations used by working professionals, from budget-friendly beginner setups to advanced studio configurations that deliver magazine-worthy results.
Why Lighting Setup Matters More Than You Think
Many photographers obsess over gear — megapixels, autofocus speed, dynamic range — but the truth is that light is the raw material of photography. A mediocre camera with excellent lighting will always outperform a $5,000 body with poor lighting. The way you position, diffuse, and modify light sources directly controls mood, depth, texture, and color accuracy in every frame you capture. Learning to set up your lights intentionally means you stop relying on whatever happens to be available and start crafting images with purpose.
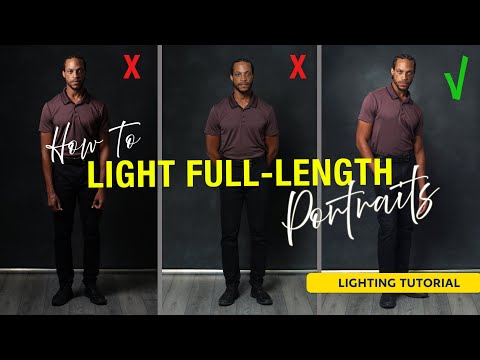
Here’s why investing time in mastering your photography lighting setup pays dividends: it gives you repeatable, consistent results. It allows you to work in any environment — a dim restaurant, an overcast day, or a windowless studio. And it lets you tell stories through shadows and highlights in a way that feels intentional rather than accidental.

Best Photography Lighting Setups by Genre
Different photography styles demand different approaches to light. What works for a beauty portrait won’t necessarily suit a product shot, and a headshot setup varies greatly from a full-body fashion layout. Below are the most reliable lighting configurations broken down by category.
Portrait Lighting Setups
When it comes to portrait photography lighting, the goal is to sculpt the face with highlights and shadows that create dimension and emotion. The most popular configurations include:
- Rembrandt Lighting: A single key light positioned at roughly 45 degrees to one side and slightly above the subject. This creates a characteristic triangle of light on the shadowed cheek, producing moody, cinematic portraits.
- Butterfly Lighting (Paramount Lighting): The key light is placed directly in front of and above the subject, casting a butterfly-shaped shadow beneath the nose. This is a favorite for beauty and fashion photography.
- Split Lighting: The light source hits exactly half of the subject’s face, leaving the other half in shadow. This dramatic setup works exceptionally well for artistic and editorial portraits.
- Loop Lighting: A slight variation of Rembrandt where the shadow from the nose loops down and to the side without touching the cheek. It’s flattering for most face shapes and a go-to for headshot photographers.
Product Photography Lighting
Product photography lighting setups prioritize even, controlled illumination that reveals texture and color without harsh reflections or hot spots. The standard approach includes:
- A large softbox or diffused panel as the primary key light, positioned at a 30-to-45-degree angle to the product.
- A secondary fill light or reflector on the opposite side to open up shadows gently.
- A background light or gel to add color or separation between the product and the backdrop.
- Small strip softboxes or snoots for creating specular highlights on glossy or reflective surfaces like glass and metal.
Studio Lighting for Beginners
If you’re just starting out, don’t feel pressured to buy a complete studio kit. The most effective beginner lighting setup involves just one or two sources:
- A single continuous LED panel or strobe with a softbox or umbrella modifier.
- A white foam board or collapsible reflector for filling shadows on the opposite side.
- A lamp or practical light in the background for ambient depth and context.
This minimalist approach teaches you the fundamentals — light placement, modifier choice, and ratio control — without overwhelming you with equipment or complexity.
Essential Lighting Equipment for Your Setup
Building a versatile lighting kit doesn’t require a massive budget. Here are the core pieces every photographer should consider:
| Equipment | Best For | Budget Range |
| Strobe / Flash (e.g., Godox AD200) | High-power, freeze-motion, outdoor portraits | $200–$600 |
| Continuous LED Panel (e.g., Aputure 600d) | Video work, real-time visualization, beginners | $150–$1,200 |
| Softbox (60x90cm or larger) | Soft, flattering portraits and products | $30–$150 |
| Reflector (5-in-1 collapsible) | Natural light fill, budget-friendly bounce | $15–$40 |
| Light Stand with Boom Arm | Positioning lights overhead or at awkward angles | $20–$80 each |
| Grid / Snoot Modifier | Controlled spot light, dramatic accent lighting | $20–$60 |
When choosing between continuous lights and strobes, consider your workflow. Continuous LED lights let you see exactly how the light falls on your subject in real time, which is invaluable for learning and video production. Strobes and speedlights deliver far more power, allowing you to overpower sunlight and freeze fast action — making them the preferred choice for many professional portrait and event photographers.
Advanced Lighting Techniques to Elevate Your Work
Once you’ve mastered the basics, these advanced lighting techniques will help you create images that stand out from the crowd.
Using Multiple Light Ratios
Controlling the ratio between your key light and fill light determines the contrast and mood of your image. A 2:1 ratio (key light twice as bright as fill) produces a softly lit, approachable look ideal for corporate headshots. A 4:1 or 8:1 ratio creates deep, dramatic shadows commonly used in fashion and fine art portraiture. Use a handheld light meter or your camera’s histogram to fine-tune these ratios precisely.
Adding a Hair Light or Rim Light
Placing a small strobe or strip box behind your subject and aimed at their hair or shoulders creates a thin line of light that separates the subject from the background. This technique, often called edge lighting or rim lighting, adds a professional three-dimensional quality to portraits and is nearly universal in commercial and editorial work.
Color Gels and Mixed Lighting
Adding colored gels to your lights opens up creative possibilities that go far beyond neutral white illumination. CTB (color temperature blue) gels cool down warm ambient light, while CTO (color temperature orange) gels warm up cooler environments. Some photographers mix warm and cool gels on separate lights to create a stylized, cinematic split-tone effect that’s become increasingly popular in social media and advertising photography.
Comparison of Popular Lighting Setups
| Setup | Number of Lights | Best For | Skill Level | Cost Estimate |
| Single Key + Reflector | 1 + 1 reflector | Beginner portraits, natural light simulation | Beginner | $100–$300 |
| Two-Point Classic Portrait | 2 lights | Professional headshots, family portraits | Intermediate | $400–$1,000 |
| Three-Point Studio Setup | 3 lights | Full-body portraits, commercial work | Intermediate | $700–$2,000 |
| High-Key Beauty Lighting | 3–4 lights + background | Beauty, cosmetics, fashion | Advanced | $1,500–$4,000 |
| Multi-Light Product Lab | 4–6 lights | E-commerce, catalog, food photography | Advanced | $2,000–$6,000 |
Expert Tips for Mastering Your Lighting Setup
Seasoned photographers follow a few principles that consistently produce better results. Keep these tips in mind as you build and refine your lighting configurations:
- Start with one light and master it before adding more. Each additional light introduces complexity and potential for error. Build your skills incrementally.
- Pay attention to light quality, not just quantity. A large, diffused light source creates softer shadows than a small, bare bulb — even at the same power level. The relative size of the light source compared to your subject is what matters most.
- Use the inverse square law to your advantage. Moving your light twice as far away from the subject reduces its intensity to one-quarter. This gives you precise control over falloff and background exposure.
- Shoot in RAW and bracket your exposures when experimenting. This gives you maximum flexibility to recover detail in highlights and shadows during post-processing.
- Observe natural light to train your eye. Spend time studying how sunlight behaves at different times of day and through different weather conditions. The principles of natural light — direction, diffusion, color temperature — apply directly to artificial setups.
- Invest in modifiers before buying more lights. A high-quality softbox or beauty dish will transform a single strobe into a versatile, professional-grade tool.
Final Thoughts on Finding the Best Photography Lighting Setup
The truth about photography lighting setups is that there’s no single “best” configuration — the best setup is the one that serves your subject, your creative vision, and your practical constraints. Whether you’re working with a single LED panel in a living room or a fully rigged studio with six strobes, the principles remain the same: control your light’s direction, modify its quality, and balance it against your ambient environment. Start simple, experiment relentlessly, and let each shoot teach you something new about how light behaves. The photographers who produce consistently stunning work aren’t the ones with the most expensive gear — they’re the ones who understand light deeply and apply that understanding with intention and creativity.
Frequently Asked Questions
What is the best lighting setup for beginners in portrait photography?
The best starting point is a single strobe or continuous light paired with a softbox or umbrella modifier, positioned at a 45-degree angle to your subject. Add a white foam board or collapsible reflector on the opposite side to gently fill shadows. This one-light-plus-reflector configuration is simple, affordable, and teaches you the core principles of light placement and shadow control that every photographer needs.
How many lights do I need for a professional studio setup?

Most working photographers find that three lights form the foundation of a professional studio setup: a key light, a fill light, and a hair or rim light. This three-point lighting system provides enough flexibility to handle virtually any portrait or product assignment. You can add background lights or accent lights as your specific needs demand, but three quality lights will cover the vast majority of professional work.
Can I use natural window light as a photography lighting setup?
Absolutely. Window light is one of the most beautiful and accessible light sources available. Position your subject perpendicular to the window for Rembrandt-style lighting, or place them facing the window for soft, even frontal illumination. Use a sheer curtain to diffuse harsh midday sun, and a white reflector on the shadow side to balance the exposure. Many award-winning photographers regularly shoot exclusively with window light.
What’s the difference between continuous lighting and strobe lighting for photography?
Continuous lights (such as LED panels) stay on constantly, allowing you to see exactly how the light falls on your subject in real time. They are ideal for beginners, video work, and situations where you need to see shadows and reflections as they happen. Strobes and speedlights fire a burst of light at the moment of exposure, offering significantly more power, faster recycle times, and the ability to overpower bright ambient light like sunlight. Strobes require test shots or modeling lights to visualize the effect, but they deliver superior versatility for challenging lighting conditions.
How do I choose the right light modifier for my photography setup?
The right modifier depends on the look you want. Softboxes produce broad, even light perfect for portraits and products. Umbrellas are portable and fast but less controllable. Beauty dishes create a distinctive wrap-around light with a sharp highlight that’s beloved for fashion and beauty work. Grids and snoots narrow the light beam for dramatic accents and controlled highlights on specific areas. For most photographers, a large softbox and a collapsible reflector will handle 80% of shooting scenarios effectively.