


When it comes to creating professional-looking video content, the lamp you choose for video recording can make or break the entire production. Whether you are a YouTuber filming in a home studio, a filmmaker shooting a short documentary, or a business owner producing promotional clips, understanding how to properly light your subject is absolutely essential. The right lighting setup not only illuminates your scene but also shapes the mood, enhances color accuracy, reduces unwanted shadows, and gives your footage that polished, cinematic look that audiences expect. In this comprehensive guide, we will dive deep into the world of lamps for video recording — exploring every type of light source, the key features you should prioritize, budget-friendly options, and expert techniques that will elevate your video production from amateur to professional level.
Why Lighting Matters for Video Recording
Before we get into specific lamps and fixtures, it is important to understand why lighting is the single most critical investment you can make in your video production setup. Cameras capture light, and without proper illumination, even the most expensive camera equipment will produce flat, noisy, and unappealing footage. Good lighting reveals texture, adds depth to your composition, and ensures that skin tones look natural and flattering. On the other hand, poor lighting leads to grainy shadows, overexposed highlights, and an overall unprofessional appearance that viewers immediately notice.
Beyond aesthetics, consistent lighting also gives you far more flexibility during the editing process. When your footage is properly exposed and color-balanced at the time of shooting, you spend less time correcting exposure issues and more time refining the creative elements of your video. This is especially true for content creators who work under tight deadlines or produce videos regularly.
Types of Lamps for Video Recording
The lighting market offers a surprisingly wide variety of options tailored specifically for video production. Understanding the differences between them will help you make an informed decision based on your shooting environment, budget, and creative goals.
LED Panels
LED panels have become the go-to choice for most video creators today, and for good reason. They are energy-efficient, produce minimal heat, and offer adjustable color temperature — typically ranging from 3200K (warm) to 5600K (daylight). Many modern LED panels also feature dimming controls and built-in diffusion layers that create a soft, even glow across your subject. Models like the Aputure Amaran series and the Neewer LED panels are popular among both beginners and seasoned professionals because they deliver excellent output at accessible price points.
Ring Lights
Ring lights are circular-shaped illumination sources that surround the camera lens, producing a distinctive wraparound glow with minimal harsh shadows. They are extremely popular among beauty vloggers, makeup artists, and social media content creators because they create a flattering, even spread of light that is gentle on the face. Ring lights come in various diameters — from compact 10-inch portable options ideal for travel to larger 18-inch studio setups designed for full-face coverage.
Softboxes and Key Lights
A softbox is a rectangular fabric enclosure that fits over a light source — usually an LED or strobe — and diffuses the light through a translucent front panel. The result is a broad, soft illumination that wraps around your subject beautifully, reducing hard shadows and creating a professional, studio-quality look. Softboxes are staples in interview setups, product photography videos, and any scenario where you want clean, flattering key light on your subject. They are typically mounted on light stands and positioned at a 45-degree angle to the subject for optimal results.
Fresnel Lights
Fresnel lights use a specially designed lens that allows you to adjust the beam angle from a narrow spot to a wide flood. This makes them incredibly versatile for video recording, especially in larger studio environments or on-location shoots. They are commonly found in professional film production and offer precise control over light spread and intensity. While Fresnel lights tend to be bulkier and more expensive than LED panels, they deliver a level of control that few other lighting instruments can match.

Tube Lights and Nanlite Tubes
Light tubes, such as the Nanlite PavoTube or Aputure MC, are flexible, elongated LED strips that can be bent into shapes or mounted in creative positions. They are excellent for adding colored accent lighting, creating rim light effects, or illuminating background elements in your video frame. Tube lights are compact, portable, and increasingly popular among creators who want to add a cinematic color-graded look to their footage without investing in large studio fixtures.
Key Features to Consider When Choosing Recording Lamps
Not all video lights are created equal, and selecting the right one requires understanding the technical specifications that matter most for video production.
- Color Temperature (CCT): Look for lights with adjustable color temperature so you can match ambient lighting or create specific moods. Dual-tone LEDs with 3200K–5600K range are ideal.
- Color Rendering Index (CRI) and TLCI: A CRI of 95 or above ensures that colors appear accurate and natural on camera. TLCI (Television Lighting Consistency Index) is a video-specific metric that is equally important.
- Dimming and Brightness Levels: A dimmable light gives you full control over intensity. Check the lumens output — for small studio setups, 1000–3000 lumens is usually sufficient, while larger spaces may require 5000+ lumens.
- Flicker-Free Operation: Cheap LEDs can produce visible flickering when filmed at certain frame rates. Always choose lights that are rated flicker-free for smooth, professional footage.
- Portability and Mounting Options: If you film on location, lightweight lights with magnetic mounts, Bowens-style fittings, or integrated stands are highly practical.
- Battery Compatibility: For run-and-gun shooting, battery-powered LED panels like the Aputure Amaran 60x offer cordless freedom without sacrificing output quality.
Best Lamps for Video Recording by Budget Level
Finding the right lamp for video recording does not have to break the bank. Here is a breakdown of top options across different budget ranges.
| Budget Range | Recommended Lamp | Key Strengths | Approximate Price |
| Entry-Level (Under $50) | Neewer 660 LED Panel | Adjustable CCT, lightweight, great for beginners | $30–$50 |
| Mid-Range ($50–$200) | Aputure Amaran 200x | High CRI, dimmable, versatile mounting options | $150–$200 |
| Premium ($200–$500) | Aputure Amaran 60x | High output, bi-color, battery-compatible, flicker-free | $300–$400 |
| Professional ($500+) | Aputure Light Storm LS 600d | Cinema-grade output, precise beam control, industry standard | $500+ |
For beginners just starting out, the Neewer 660 LED panel is an outstanding value — it delivers reliable illumination with adjustable color temperature at a price point that makes it easy to experiment with lighting setups without financial risk. Intermediate creators will benefit greatly from the Aputure Amaran 200x, which offers superior build quality, excellent color accuracy, and a wide range of mounting accessories. Professionals and dedicated videographers should consider investing in the Aputure Light Storm series, which provides cinema-grade output and compatibility with professional modifiers like softboxes, beauty dishes, and grids.
Expert Tips for Setting Up Your Video Lighting
Having the best lamps for video recording is only half the battle — knowing how to position and use them effectively is what truly transforms your footage. Here are some proven techniques used by experienced videographers:

- The Three-Point Lighting Setup: This classic technique uses a key light (your primary source), a fill light (to soften shadows on the opposite side), and a back light (to separate your subject from the background). It works for interviews, talking-head videos, and product shots alike.
- Use Diffusion When Possible: Even LED panels can produce harsh shadows if placed too close or without a modifier. Adding a softbox, diffusion cloth, or even a white bedsheet between the light and your subject instantly creates a softer, more flattering result.
- Mind the Color Temperature: Mixing daylight and tungsten light sources in the same frame creates ugly color casts that are difficult to fix in post-production. Stick to a single color temperature or use gel filters to match mismatched sources.
- Position Lights at 45-Degree Angles: Placing your key light at a 45-degree angle to the subject and slightly above eye level creates natural-looking shadows that add dimension and depth to the face.
- Watch for Green Spill: If you are filming near green walls or in a room with large windows, ambient light can cast unwanted green tones on your subject. Use flags, negative fill, or adjust your light positioning to minimize this effect.
- Always White Balance Correctly: Set your camera’s white balance to match your lamp’s color temperature precisely. This ensures accurate skin tones and eliminates the need for heavy color correction during editing.

Common Mistakes to Avoid When Using Lamps for Video Recording
Even experienced creators sometimes fall into lighting traps that degrade their footage quality. Avoid these common mistakes:
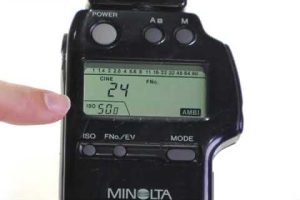
- Overlighting the Scene: Too much light flattens the image, removes contrast, and makes the video look unnatural. Use a light meter or your camera’s histogram to ensure balanced exposure.
- Ignoring Background Lighting: Your subject should be properly lit, but the background also matters. Add a small accent light or use practical lamps in the background to create depth and visual interest.
- Using Unregulated Power Sources: Cheap power strips and extension cords can cause flicker or inconsistent brightness, especially with high-draw LED fixtures. Use dedicated circuits or battery-powered solutions when possible.
- Placing Lights Too Close: Getting your light source too close to the subject creates uneven illumination and harsh shadows. Maintain a reasonable distance and use dimming controls to adjust intensity.
Conclusion
Investing in quality lamps for video recording is one of the most impactful upgrades you can make to your content creation workflow. Whether you are starting with a simple LED panel and a ring light or building an elaborate three-point studio setup, the principles remain the same: control your light, match your color temperatures, diffuse for softness, and always consider how the light interacts with your subject and environment. Start with what fits your budget, experiment with positioning and modifiers, and gradually expand your lighting kit as your skills and ambitions grow. The difference between flat, poorly lit footage and professionally illuminated video is often just a few well-placed lights away.
Frequently Asked Questions
What type of lamp is best for recording YouTube videos at home?
LED panels with adjustable color temperature and high CRI ratings are the best choice for home YouTube recording. They are affordable, energy-efficient, and produce minimal heat, making them comfortable for long filming sessions in small spaces like bedrooms or office setups.
Do I need expensive lamps for professional-looking video recordings?
Not necessarily. Many mid-range LED panels and ring lights produce stunning results when used correctly. Proper positioning, diffusion, and color temperature matching matter far more than the price tag on your lighting equipment.
Can I use regular household lamps for video recording?
Household lamps can work in a pinch, but they typically have fixed color temperatures, low CRI ratings, and uneven light spread. They often produce visible flicker and cast unflattering color casts. Dedicated video lights are strongly recommended for consistent, professional results.
What is the ideal color temperature for video recording lamps?
For most video content, a color temperature between 4000K and 5600K produces clean, natural-looking results that replicate daylight. For moodier or more intimate scenes, 3200K warm tones work beautifully. The key is consistency — use the same color temperature across all your light sources in a single setup.
How many lamps do I need for a basic video recording setup?
A basic setup requires at least two lights: a key light as your primary illumination source and a fill light to reduce harsh shadows. Adding a third back light creates the classic three-point setup and gives your footage a professional, layered look that separates your subject from the background.