


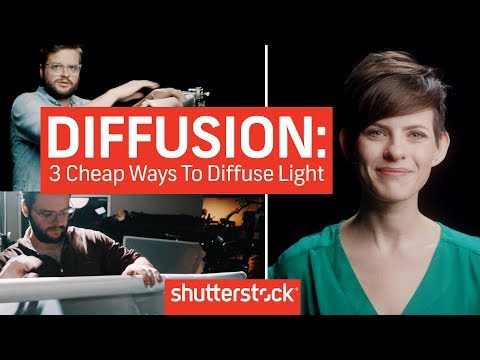
When you look at a professional portrait or a breathtaking product shot, one thing almost always stands out: the light. It wraps around subjects gently, fills in harsh shadows, and creates a depth that feels almost three-dimensional. That magic comes from diffused light photography, a technique that transforms ordinary lighting into something extraordinary. Whether you are a beginner just learning how to shape light or an experienced photographer looking to refine your craft, understanding how to create and harness soft, scattered light will elevate your work dramatically. This guide covers everything from the fundamentals of light diffusion to advanced techniques, practical tools, and expert tips that will help you master this essential skill.
What Is Diffused Light Photography?
Diffused light photography refers to the practice of using light that has been scattered or softened before it reaches your subject. Unlike direct light, which creates sharp shadows and high contrast, diffused light spreads out evenly, wrapping around surfaces and reducing the intensity of highlights and shadows. Think of it as the difference between standing under the blazing midday sun and standing under a cloudy sky. Both sources produce light, but the experience and the resulting image feel completely different.
At its core, diffused light photography relies on the principle that when light passes through a translucent material or reflects off a large surface, it scatters in multiple directions. This scattering effect reduces the hardness of shadows, minimizes skin imperfections, and produces a more flattering, natural look. Photographers working in portrait, product, fashion, and even architectural photography rely heavily on diffusion techniques to achieve their signature aesthetics.
Why Diffused Light Matters in Photography
Understanding why diffused light is so powerful begins with how the human eye perceives depth, texture, and form. Harsh, direct light flattens subjects and creates distracting hotspots, while soft light reveals subtle textures and gradations that make images feel lifelike. Here are the key reasons diffused light is a cornerstone of professional photography:
- Flattering skin tones: Soft light minimizes the appearance of pores, wrinkles, and blemishes, making it the go-to choice for portrait and beauty photography.
- Reduced harsh shadows: Diffused light creates gradual transitions between light and shadow, resulting in a more balanced and pleasing exposure.
- Better color rendering: When light scatters evenly, colors appear more natural and accurate, which is critical for product and food photography.
- Greater control: Diffused light is easier to manage and shape because it behaves predictably, giving photographers more creative freedom.
- Versatility across genres: From newborn portraits to commercial product shots, diffused light adapts to virtually any subject matter.
The Science Behind Soft Light
Light behaves as both a particle and a wave, and when it encounters a barrier or a translucent surface, it bends and spreads out—a phenomenon known as scattering. The larger the light source relative to your subject, the softer the light appears. This is why overcast skies produce such beautiful, diffused illumination: the entire cloud layer acts as a massive, natural softbox. Conversely, a small, bare flash creates a hard, directional beam because the light source is small relative to the subject.

When you place a diffusion panel between a light source and your subject, you are essentially increasing the apparent size of the light source. The photons pass through the material, lose their direct trajectory, and strike the subject from a wider range of angles. This is the fundamental principle behind every diffused lighting setup, whether you are using a $10 bedsheet or a professional-grade scrim.
Best Tools and Modifiers for Creating Diffused Light
One of the great things about diffused light photography is that you do not need expensive gear to get started. However, as you advance, having the right tools gives you significantly more control and consistency.
Natural Diffusion Tools
Before investing in artificial modifiers, learn to work with what nature provides. Overcast days are a photographer’s best friend for soft light work. Large windows with sheer curtains also act as natural diffusers, transforming a harsh beam of sunlight into a gentle, directional glow. Shooting outdoors under tree canopies or beside white walls that bounce sunlight are other simple, effective strategies for natural light diffusion.
Artificial Diffusion Modifiers
- Softboxes: These enclosures fit over strobes or speedlights and diffuse light through a translucent front panel. They come in various shapes—rectangular, octagonal, and strip—each suited for different shooting scenarios. A large rectangular softbox is ideal for full-body portraits, while an octagonal softbox creates round, flattering catchlights in the eyes.
- Umbrellas: Shoot-through umbrellas are among the most affordable and portable diffusion tools. White shoot-through umbrellas scatter light broadly, making them excellent for group shots and fill lighting.
- Diffusion panels and scrims: These are standalone frames with translucent fabric stretched across them. You position them between a hard light source and your subject to soften the beam. They are indispensable for outdoor shoots where you cannot control the weather.
- Light tents and boxes: Popular in product photography, these enclosures surround the subject entirely with diffused light, eliminating virtually all shadows. They are perfect for photographing small objects, jewelry, and electronics.
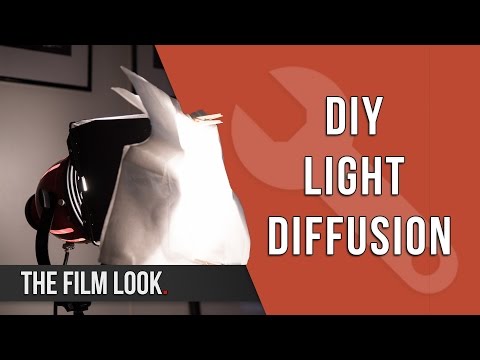
- DIY diffusion solutions: A white bedsheet hung over a window, a translucent shower curtain placed in front of a lamp, or even a white foam board positioned to bounce flash light can produce surprisingly professional results.
Diffused Light vs Direct Light: A Comparison
To truly appreciate the power of diffusion, it helps to compare it directly against its counterpart: direct, hard light. The table below highlights the key differences across several critical dimensions.
| Attribute | Diffused Light | Direct Light |
| Shadow Edge Quality | Soft, gradual transitions | Hard, sharp edges |
| Contrast Ratio | Low to medium | High |
| Skin Appearance | Smooth, flattering | Reveals texture and imperfections |
| Best Use Cases | Portraits, beauty, products, food | Dramatic portraits, action, sports |
| Control Complexity | Easier to manage | Requires precise positioning |
| Lighting Setup Speed | Slightly more setup time | Quick and straightforward |
| Mood and Atmosphere | Gentle, calm, approachable | Bold, dramatic, intense |
Neither type of light is inherently better than the other. The best photographers understand how to use both and often combine them within a single setup to achieve a balanced, dynamic look. For instance, a diffused key light paired with a small, hard fill light can add depth and dimension while keeping the overall image pleasing and approachable.

Techniques for Shooting with Diffused Light
Now that you understand the tools and the science, let us explore practical techniques organized by skill level.
Beginner: Working with Overcast Skies and Window Light
If you are just starting out, your most accessible diffused light source is the sky itself. On an overcast day, step outdoors and observe how the light falls on faces, buildings, and landscapes. Notice how shadows are barely visible and colors appear saturated yet natural. This is diffused light at its finest.
Indoors, position your subject near a large window with a sheer curtain or a light-colored blind partially drawn. The window acts as your light source, and the curtain serves as your diffusion modifier. Rotate your subject slowly and observe how the angle of the light changes the shadow patterns on their face. Pro tip: for portraits, position the subject so the light falls at roughly a 45-degree angle to their face—this classic Rembrandt lighting angle works beautifully with diffused sources.
Intermediate: Softboxes, Umbrellas, and Reflectors
Once you are comfortable with natural light, bring artificial modifiers into your workflow. Set up a softbox as your primary light source and position it slightly above and to the side of your subject. Add a reflector on the opposite side to bounce some of the soft light back into the shadow areas. This creates a subtle, three-dimensional look that is far more compelling than flat, evenly lit shots.
Experiment with the distance between your softbox and your subject. Moving the light closer increases the softness of the light (because the relative size of the source grows), while moving it farther away makes the light slightly harder. This inverse square law relationship is one of the most powerful tools in a photographer’s arsenal for controlling soft lighting setups.
Advanced: Layering Diffusion Materials for Precision Control
Advanced photographers often stack multiple diffusion layers to fine-tune the quality of light. For example, placing a double-layered diffusion scrim in front of a powerful strobe can transform an intense, focused beam into a broad, enveloping wash of light. This technique is particularly effective in high-end product photography and fashion work, where every shadow and highlight is meticulously controlled.
Consider also combining diffusion with colored gels or flags to shape the light further. A diffused light source with a subtle warm gel can create a golden-hour feel indoors, while a flag placed on one side of the subject can add intentional shadow for dramatic contrast. The key is to build the light layer by layer, constantly evaluating the effect through your camera’s monitor or a handheld light meter.
Expert Tips for Mastering Diffused Light Photography
- Chase the largest possible light source: The bigger the light relative to your subject, the softer it will be. When shooting outdoors, position your subject so they face open sky rather than direct sun.
- Use a light meter: While your camera’s histogram is useful, a handheld incident light meter gives you precise readings of your diffused light, helping you make consistent exposure decisions across multiple shots.
- Watch for color temperature shifts: Some diffusion materials slightly warm or cool the light. Thicker fabrics or materials with a tint can alter the color balance of your image, so white balance adjustments are essential.
- Combine diffusion with bounce techniques: A large white wall or ceiling can act as a secondary diffuser, bouncing already-soft light back onto your subject for an even more uniform illumination.
- Shoot during golden hour with diffusion: Pairing the warm tones of golden hour with a diffusion panel creates the most flattering, cinematic light possible for portraits and landscapes alike.
- Always test before the client arrives: Spend time setting up and fine-tuning your diffusion setup before your shoot begins. Lighting adjustments take time, and rushing leads to compromised results.
Frequently Asked Questions
What is the best time of day to shoot diffused light portraits?
The golden hours around sunrise and sunset naturally produce softer, warmer light, and when combined with a diffusion panel, the results are stunning. However, overcast midday light is equally effective for diffused lighting because the cloud cover acts as a giant natural softbox, eliminating harsh shadows entirely.
Can I create diffused light without any special equipment?
Absolutely. Shooting on an overcast day, positioning your subject near a large window with a sheer curtain, or hanging a white bedsheet in front of a window are all effective ways to achieve beautiful diffused light without purchasing any dedicated photography gear.
How does diffused light affect product photography?
Diffused light is the gold standard for product photography because it eliminates harsh reflections and hot spots on glossy surfaces. It reveals true-to-life colors and textures, making it ideal for photographing everything from cosmetics and jewelry to electronics and food packaging.
What is the difference between diffusion and diffusion + bounce lighting?
Diffusion softens the light as it passes through a material, while bounce lighting redirects existing light off a reflective surface. Combining both techniques—diffusing a flash and then bouncing that diffused light off a white ceiling—produces extraordinarily soft, even illumination that is nearly shadowless.
Is diffused light suitable for dramatic or moody photography?
Yes. While diffused light is often associated with soft, flattering portraits, skilled photographers use it as a base and then add flags, barn doors, or secondary hard light sources to introduce controlled drama and contrast. The key difference is that the overall image retains a smooth, polished quality even when the mood is dark or cinematic.
Conclusion
Diffused light photography is not just a technique—it is a mindset. It teaches you to see light differently, to notice how it wraps around surfaces, how it reveals or conceals texture, and how it shapes the emotional tone of an image. From your very first attempts with a sheer curtain and a window to your most advanced multi-light studio setups, mastering light diffusion is one of the highest-return investments you can make as a photographer. The tools are accessible, the learning curve is manageable, and the results speak for themselves. Start experimenting today, and you will notice an immediate improvement in the quality, mood, and professionalism of every photograph you create.