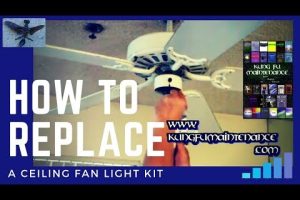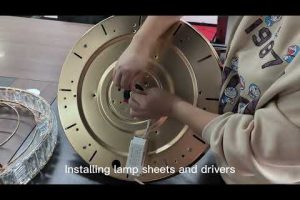



Dealing with a ceiling fan that has no light can be one of the most frustrating experiences in home maintenance — especially when you need both airflow and illumination in the same fixture. Whether you purchased a fan that never came with a light kit, inherited one from a previous homeowner, or watched the light stop working overnight, the issue is more common than most people realize. Understanding why your ceiling fan no light situation exists and what you can do about it saves money, prevents unnecessary frustration, and often takes less time than you might expect. This comprehensive guide walks you through every angle — from the most basic wiring problems to advanced solutions — so you can make informed decisions and restore full functionality to your ceiling fan.
Why Does a Ceiling Fan Have No Light?
Before jumping into repairs or replacements, it helps to understand the root cause. A ceiling fan without a light kit can stem from several very different reasons — some are simple oversights, while others point to underlying electrical or mechanical issues.
Missing Light Kit From the Start
Many modern ceiling fans are sold as fan-only units. Manufacturers increasingly separate the light kit because consumers want flexibility — some prefer fans without lights for aesthetic or energy reasons. If you purchased a fan with no pull chain or light fixture on the canopy, it likely shipped without one. Check the product manual or the manufacturer’s model number to confirm whether the fan was ever designed to support a light.
Disconnected or Faulty Wiring
Over time, the internal wiring connecting the light module to the fan motor can loosen. This is especially common in older homes where the ceiling box has shifted, or when someone previously removed and reinstalled the light kit without securing the connectors properly. A loose wire nut or a detached blue (or black) wire in the junction box is the culprit in a surprising number of cases.
Burned-Out Bulbs or Faulty Socket
Sometimes the answer is refreshingly simple. LED bulbs, while long-lasting, do eventually fail — often without warning. The socket itself can also corrode or lose contact, especially in humid environments like bathrooms and covered porches where moisture creeps into the fixture.
Faulty Pull Chain Switch or Receiver Module
Many ceiling fans use a pull chain switch for the light, while remote-controlled models rely on an internal receiver board. A broken chain, a dead receiver, or a tripped smart-home module can all make your ceiling fan light not working even when the fan itself operates perfectly.
How to Troubleshoot a Ceiling Fan With No Light

Before you call an electrician or order replacement parts, work through this systematic troubleshooting process. Each step narrows down the cause and prevents unnecessary purchases.
- Check the circuit breaker. Sometimes the fan and light share a breaker that tripped. Reset it and test both functions.
- Inspect the light bulbs. Remove each bulb and look for a darkened filament or a broken base. Test them in a known-working lamp if possible.
- Examine the pull chain switch. Pull it gently but firmly a few times. If it feels loose or snaps back without clicking, the switch is likely broken.
- Turn off the breaker and inspect the wiring. Open the canopy and look for disconnected or corroded wires. Use a voltage tester to confirm no power is present before touching anything.
- Test the receiver module (remote-controlled fans). Locate the receiver, usually housed inside the fan’s downrod or mounting bracket. Replace it if the indicator light is off or unresponsive.
- Check the wall switch. Some homes use a single wall switch for both the fan and light. If the switch is a dimmer, it may not be compatible with the light kit’s LED driver.
How to Add a Light Kit to a Ceiling Fan Without One
If your fan was sold without a light and you want one, adding a kit is usually straightforward — provided your fan is compatible and your ceiling box is rated for the additional weight.
Verify Compatibility
Not every fan accepts every light kit. Look for a crossbar or mounting bracket on the fan’s top housing that shows a light kit attachment point. The manufacturer’s website or support line can confirm which kits fit your model. Using an incompatible kit risks improper fit, wobbling, or electrical hazards.
Choose the Right Light Kit
Light kits come in several styles:
- Basic canopy kits — a simple dome with a socket, ideal for clean, minimalist looks.
- Rocker-style kits — include a switch built into the fixture, eliminating the need for a pull chain.
- Decorative kits — feature glass shades, crystals, or brushed metal finishes that complement the fan’s design.
- Smart-compatible kits — integrate with Wi-Fi or Zigbee ecosystems for app or voice control.
Installation Steps
- Turn off power at the breaker and verify with a voltage tester.
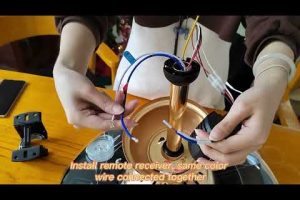
- Remove the fan’s top cap or canopy to expose the wiring.
- Locate the light kit wire leads (typically blue or red) coming from the fan motor housing.
- Connect the light kit wires to the corresponding fan wires using wire nuts.
- Secure the light kit to the mounting bracket using the provided screws.
- Install bulbs, attach any shades, and restore power.
Expert tip: Always ensure your ceiling box is rated for a fan — and the additional weight of a light kit. A standard electrical box not rated for fan support can become a safety hazard over time.
Common Ceiling Fan Light Kit Problems and Solutions
Even after installing a light kit, issues can arise. Here is a breakdown of the most frequent problems homeowners encounter:
| Problem | Likely Cause | Solution |
| Light flickers intermittently | Loose bulb, incompatible dimmer, or failing LED driver | Tighten the bulb, replace the dimmer with a fan-compatible switch, or swap the LED driver |
| Light works only on one speed setting | Wiring conflict between fan speed and light circuit | Check for shared neutral wires and consult the wiring diagram in the manual |
| Light makes a buzzing sound | Incompatible dimmer switch or overloaded circuit | Replace with a non-dimming switch or upgrade to a compatible LED-compatible dimmer |
| No power to the light at all | Tripped breaker, loose wire, or dead pull chain switch | Reset the breaker, re-seat wire connections, or replace the pull chain switch |
| Light turns on but is dim even at full power | Voltage drop across long wire runs or undersized wiring | Upgrade to 14-gauge wire if feasible, or consult an electrician for circuit evaluation |
Replacing a Ceiling Fan Light Kit Entirely
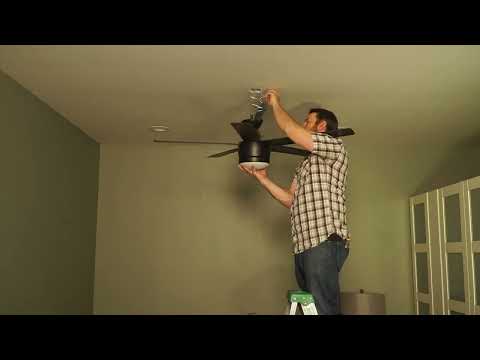
If the light kit is damaged beyond repair — cracked housing, melted socket, or irreparable wiring — replacing the entire unit is often the most practical solution. Most replacement kits cost between $20 and $100, depending on style and features, and installation typically takes 15 to 30 minutes.
Before purchasing a replacement, measure the canopy diameter and the mounting bracket dimensions. Universal light kits exist, but model-specific kits ensure a perfect fit and maintain the fan’s warranty. Popular brands like Hunter, Hampton Bay, Minka Aire, and Big Ass Fans all offer factory-direct replacement kits that are plug-and-play for their respective models.
When to Call a Professional
If you encounter any of the following situations, stop troubleshooting and contact a licensed electrician:
- You smell burning plastic or notice scorch marks on the wiring.
- The ceiling box feels loose or the fan vibrates excessively when the light is on.
- The breaker trips repeatedly after restoring power to the light circuit.
- You are uncomfortable working with electrical wiring and do not have a helper to verify the breaker is off.
Preventing Future Light Issues on Your Ceiling Fan
Proactive maintenance keeps your ceiling fan lighting reliable for years. Follow these practical recommendations to avoid recurring problems with your ceiling fan no light situation:
- Use the correct bulb type and wattage. Check the maximum wattage rating on the light kit’s socket — exceeding it causes overheating and premature failure.
- Install LED bulbs rated for enclosed fixtures. Standard LEDs can overheat in the confined space of a fan canopy. Enclosed-rated LEDs dissipate heat more effectively.
- Tighten connections during seasonal maintenance. Twice a year, turn off the breaker and check that all wire nuts and mounting screws remain secure.
- Clean the fixture regularly. Dust accumulation on bulbs and sockets can cause heat buildup and intermittent flickering. Wipe down the light kit with a dry cloth during your regular cleaning routine.
- Replace pull chain switches proactively. These small components wear out after thousands of pulls. Keeping a spare chain switch on hand means you can fix the problem in seconds instead of days.
Conclusion
A ceiling fan with no light is almost never a reason to replace the entire fixture. Whether the issue is a missing light kit, a simple wiring problem, a dead bulb, or a faulty switch, the vast majority of cases are fixable with basic tools and a little patience. By working through the troubleshooting steps outlined above, you can identify the root cause quickly and apply the right solution — saving significant money on service calls and restoring full comfort to your living space.
Take the time to match your replacement parts correctly, use bulbs that suit the fixture’s specifications, and perform light seasonal maintenance checks. Your ceiling fan will deliver reliable airflow and illumination for years to come.
Frequently Asked Questions
Why does my ceiling fan work but the light does not?
The most common reason is a burned-out bulb, a faulty pull chain switch, or a loose wire connection inside the canopy. Start by replacing the bulbs, then check the switch and wiring before moving to more complex diagnostics.
Can I add a light kit to any ceiling fan?
No — only fans designed with a light kit attachment point support aftermarket kits. Check your fan’s model number on the manufacturer’s website to confirm compatibility before purchasing a light kit.
How much does it cost to replace a ceiling fan light kit?
Factory-specific replacement kits typically range from $20 to $100, while universal kits cost $10 to $40. Professional installation adds $75 to $150, though most homeowners can install a kit themselves in under 30 minutes.
Why does my ceiling fan light only work on the dimmer setting?
This usually happens when the dimmer switch is incompatible with the LED driver in the light kit. Replace the dimmer with a standard on/off switch or use an LED-compatible dimmer rated for the fixture’s wattage.
Is it safe to use a ceiling fan with a broken light kit?
Yes — the fan’s motor and the light kit operate on separate circuits. A broken light kit does not affect the fan’s operation or safety, though you should address wiring issues promptly to prevent further damage.
How do I know if my ceiling box can support a light kit?
Check the box’s rating stamp — it should say “approved for ceiling fans.” If it only says “approved for light fixtures,” the box may not withstand the combined vibration and weight of a fan with a light kit. Upgrade to a fan-rated box before installing a light kit.