


Front lighting in photography is one of the most fundamental and versatile lighting setups you can master. Whether you are shooting portraits, product images, or street photography, understanding how to use front lighting effectively can transform your results from flat and uninspired to crisp, detailed, and visually compelling. This comprehensive guide dives deep into everything you need to know about front lighting photos — from the basics of light placement to advanced techniques that will elevate your work to a professional level. If you have ever wondered why some photographs look luminous and vibrant while others appear dull, the answer almost always comes down to how light falls on the subject, and front lighting is where that journey begins.
What Is Front Lighting in Photography?
Front lighting refers to a setup where the primary light source is positioned directly in front of the subject, or at least within a 30-degree angle from the camera’s axis. This means the light travels in the same direction the camera is pointing, illuminating the face or subject head-on. The result is a well-lit, even distribution of brightness across the subject with minimal shadows on the front-facing plane. Front lighting is often the first technique taught in photography courses because it is forgiving and easy to reproduce consistently.
When you use front lighting, the subject’s features are revealed with clarity. Wrinkles, textures, and details become visible because the light hits the surface directly rather than skimming across it at an angle. This makes front lighting ideal for product photography, passport-style portraits, and any situation where you want maximum detail and legibility. However, it is worth noting that pure front lighting can sometimes produce a flat, two-dimensional look if not balanced with fill light or subtle modifiers.
Why Front Lighting Matters for Portrait and Product Photography
The importance of front lighting extends beyond just “making the subject visible.” In commercial and editorial photography, front lighting is often the go-to choice for specific creative and technical reasons.
Here are the key reasons front lighting holds such an important place in a photographer’s toolkit:
- Even Illumination: Front lighting minimizes harsh shadows, creating a balanced exposure across the subject. This is especially valuable for e-commerce product shots where every detail matters.
- Color Accuracy: Because the light hits the subject directly, colors appear more true-to-life and saturated compared to angled lighting that can create misleading tonal shifts.
- Beginner-Friendly: New photographers can achieve consistent results with front lighting without needing advanced knowledge of light ratios or shadow placement.
- Versatility: Front lighting works indoors with artificial sources and outdoors during golden hour or overcast conditions where the sun acts as a natural front light.
- Reduced Post-Processing: Images captured with proper front lighting often require less retouching, saving valuable time in editing workflows.
Types of Front Lighting Setups You Should Know
Not all front lighting is created equal. Depending on the intensity, modifier, and distance of the light source, you can achieve dramatically different moods and textures in your images.
- Hard Front Lighting: Created with a bare flash or small, unmodified light source placed directly in front of the subject. Produces sharp shadows and high contrast, useful for dramatic or editorial looks.
- Soft Front Lighting: Achieved by using a large softbox, umbrella, or diffuser. This wraps the light gently around the subject, reducing shadow edges and creating a flattering, almost luminous quality on skin and surfaces.
- Overhead Front Lighting: The light source sits directly above and slightly in front, mimicking midday sunlight. Common in tabletop product photography.
- Bounced Front Lighting: Instead of pointing the light directly at the subject, you bounce it off a ceiling or white wall to create an extremely soft, even wash of light from the front.
How to Set Up Front Lighting for Stunning Photos
Setting up front lighting does not require expensive gear or a professional studio. With a few key tools and a clear understanding of placement, you can achieve professional-quality results almost anywhere.
Equipment You Will Need
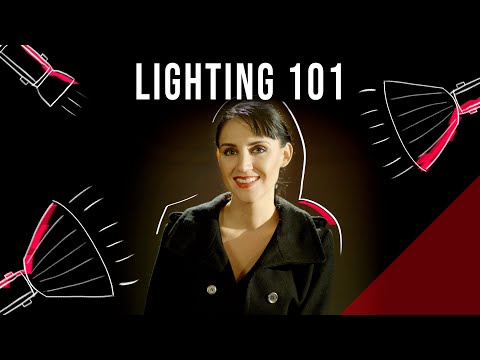
Here is a practical list of equipment to get started with front lighting photography:
- A speedlight or studio strobe as your primary light source
- A light stand or boom arm for precise positioning
- A softbox, umbrella, or diffusion panel to soften the light
- A reflective surface or fill card on the opposite side to reduce contrast
- A tripod to stabilize your camera for sharp, well-composed shots
Step-by-Step Setup Process
Follow these steps to position your front lighting correctly:
- Place your camera on a tripod and frame your subject. Make sure your composition is locked in before adjusting any lights.
- Position the main light source directly in front of the subject. Start with the light at roughly the same height as the subject’s face or product.
- Attach a softbox or diffusion modifier. This will soften the light and prevent harsh hotspots that can blow out highlights on reflective surfaces.
- Adjust the distance. Move the light closer for softer, more wraparound illumination or further away for slightly more defined shadows and contrast.
- Add a fill card or reflector opposite the light. This catches stray light and bounces it back into the shadow side, reducing the contrast ratio gently.
- Take test shots and evaluate. Check your histogram and review the image on your camera screen. Look for detail retention in both highlights and shadows.
- Fine-tune the power output and angle. Small adjustments of even five or ten degrees can significantly change the mood and dimensionality of the final image.
Expert Tip: Avoid placing your front light too close to the lens axis. Even a slight offset of 10 to 15 degrees introduces subtle dimensionality and prevents the “ring light” flatness that can make portraits look artificial.

Front Lighting vs. Other Lighting Angles: A Comparison
Understanding how front lighting compares to other lighting angles helps you make informed creative decisions. Each direction of light produces a distinct visual effect, and knowing when to use each one is what separates a competent photographer from an exceptional one.
| Lighting Angle | Shadow Placement | Best Use Case | Mood |
| Front Lighting | Minimal shadows on the face; shadows fall behind the subject | Product photography, passport photos, beauty shots | Clean, bright, even |
| Side Lighting | Shadows fall across the face, emphasizing texture and contours | Dramatic portraits, fashion editorial | Cinematic, moody |
| Back Lighting | Subject is silhouetted; light wraps around edges | Artistic portraits, rim light effects | Dreamy, ethereal |
| Rim Lighting | Highlight on the edge of the subject; dark front | Sports portraits, dramatic headshots | Bold, high-contrast |
| Top Lighting | Shadows under eyes and nose; dramatic cheekbone shadows | Fashion, sculptural portraits | Intense, angular |
As you can see from the comparison table, front lighting is uniquely suited for situations where clarity, detail, and evenness are priorities. Side lighting and back lighting introduce drama and artistic depth, but they require more skill to manage shadow balance effectively. Front lighting gives you a reliable foundation that you can build upon as your skills develop.
Advanced Techniques and Expert Tips for Front Lighting
Once you have mastered the basics of front lighting, you can explore advanced techniques that add depth, creativity, and a signature style to your work.
Add a Hair Light or Background Light
Even in a front lighting setup, the subject can sometimes blend into a similarly bright background. Adding a subtle hair light or a colored background light separates the subject from the backdrop and introduces a sense of three-dimensionality. This technique is widely used in professional portrait and headshot photography.
Use Graduated ND Filters for Outdoor Front Lighting
When shooting outdoors with the sun acting as your front light, a graduated neutral density filter can balance the exposure between a bright sky and a properly lit subject. This is particularly useful during golden hour when the sun is low and intensely bright.
Combine Front Lighting with a V-Shaped Reflector
Placing two reflectors in a V-shape below and in front of the subject creates a gentle upward fill that adds a subtle catchlight to the eyes and lifts shadows under the chin and nose. This is a favorite technique among beauty and fashion photographers who want front-lit images with a touch of dimensionality.
Experiment with Light Modifiers
A bare front light looks drastically different from the same light passed through a large diffusion panel or bounced off a V-flat. Experiment with different modifiers to understand how they shape the quality and directionality of your front light. A beauty dish, for example, gives front lighting a slightly contrasty yet soft quality that is prized in fashion editorial work.
Common Mistakes to Avoid with Front Lighting
Even experienced photographers fall into traps when working with front lighting. Being aware of these common mistakes helps you avoid them and produce consistently better images.
- Placing the light too close without a modifier: This creates an unflattering hotspot on the subject’s skin and washes out details in highlights.
- Ignoring the background: Front lighting can make the background equally bright, reducing the sense of depth. Use a darker backdrop or add separation light to combat this.
- Over-relying on front light for every shoot: While front lighting is versatile, relying exclusively on it can make your portfolio look monotonous. Learn to mix in other angles for visual variety.
- Forgetting white balance: Front lighting setups often involve artificial sources. Incorrect white balance can shift skin tones and product colors in undesirable ways.
- Skipping the fill light entirely: Pure front lighting with no fill can still produce unflattering shadows under the chin and nose. A simple white card can make a remarkable difference.
Frequently Asked Questions About Front Lighting Photos
What is the best front lighting setup for beginner photographers?
The simplest and most effective front lighting setup for beginners involves a single off-camera flash or speedlight placed directly in front of the subject, fitted with a small softbox or shoot-through umbrella. This provides soft, even illumination that is easy to meter and adjust. Pair it with a reflector on the opposite side for subtle fill, and you have a professional-looking setup that costs less than a few hundred dollars.
Can front lighting be used for outdoor photography?
Absolutely. Front lighting occurs naturally whenever the sun is behind you and illuminating your subject head-on. Early morning and late afternoon are ideal times for outdoor front lighting because the sun is lower, providing warm, directional light that flatters skin tones and landscapes alike. Overcast days also act as a massive natural front light source, wrapping soft, even illumination around your subject with no harsh shadows.
How does front lighting affect skin texture in portrait photography?
Front lighting reveals skin texture more than any other lighting angle because it illuminates the surface directly. This can be a double-edged sword: it shows every pore and imperfection, which is why beauty retouching is often more intensive with front-lit portraits. To mitigate this, use a large soft modifier and keep the light source at a moderate distance to soften the transition between highlights and shadows on the skin.
What is the difference between flat front lighting and dimensional front lighting?
Flat front lighting occurs when the light source is perfectly aligned with the camera axis, eliminating all shadows and creating a completely two-dimensional look. Dimensional front lighting uses a slight offset — typically 10 to 20 degrees — to introduce subtle shadows that add depth and form. Most professional photographers prefer dimensional front lighting because it retains the clarity of front illumination while adding a sense of volume and realism.
Is front lighting suitable for product photography?
Yes, front lighting is one of the most widely used lighting setups in product photography. It ensures that every detail, label, texture, and color is captured accurately and evenly, which is critical for commercial and e-commerce imagery. For glossy or reflective products, front lighting combined with a diffusion panel prevents unwanted glare and hot spots that could distract from the product itself.
Conclusion
Front lighting photos remain a cornerstone of effective photography across virtually every genre. From the clean, detail-rich images required for product catalogs to the flattering, evenly-lit portraits that clients love, mastering front lighting gives you a reliable tool that works in almost any situation. The key is to understand not just where to place the light, but how to shape it with modifiers, fill tools, and creative adjustments that suit your specific subject and vision. Start with the basic setup outlined in this guide, practice consistently, and gradually incorporate the advanced techniques as your confidence grows. Front lighting is not just a starting point — it is a foundation that, when combined with your unique creative eye, can produce truly stunning photographs that stand out in any portfolio.