



When you’re learning the craft of photography, one of the most fundamental concepts you’ll encounter is how light falls on your subject. Among all the lighting setups available to photographers, frontal lighting stands out as one of the most straightforward yet sometimes misunderstood techniques. Whether you’re shooting portraits, products, or architectural subjects, understanding frontal lighting photography can dramatically transform the quality and mood of your images. In this guide, we’ll break down everything you need to know—from the basics to advanced applications—so you can start using this lighting position with confidence and intention.
What Is Frontal Lighting in Photography?
Frontal lighting refers to any light source positioned directly in front of your subject, typically aimed at the camera or slightly offset along the camera’s axis. In a frontal lighting setup, the light hits the subject face-on, which means shadows fall directly behind the subject rather than across the surface of the face or object. This creates a look that is even, detailed, and often quite flattering for certain types of photography. It’s one of the first lighting patterns beginners learn because it’s intuitive and forgiving, yet many intermediate and advanced photographers continue to use it with great effect.
The key characteristic of front lighting photography is the way it minimizes shadows on the subject’s primary surfaces. Unlike side lighting or Rembrandt lighting, which sculpt the face with dramatic contrast, frontal illumination tends to flatten dimensionality. This can be a disadvantage if you’re chasing moody, dramatic images—but it becomes a powerful tool when you need clarity, even exposure, and rich detail across the entire frame.
Characteristics and Visual Effects of Frontal Lighting
Understanding the visual behavior of frontal illumination helps you decide when this lighting position serves your creative vision and when it doesn’t.
Flat Lighting vs. Dimensional Lighting
Frontal lighting is often associated with flat lighting, which means the subject lacks strong shadow gradients. This flatness reduces texture and three-dimensionality. However, flat lighting isn’t inherently bad—it simply serves a different purpose. Compare this to dimensional lighting, where shadows create depth, contour, and a sense of volume. Frontal illumination prioritizes evenness over drama, making it ideal for scenarios where you want every detail visible and nothing lost to harsh shadow.
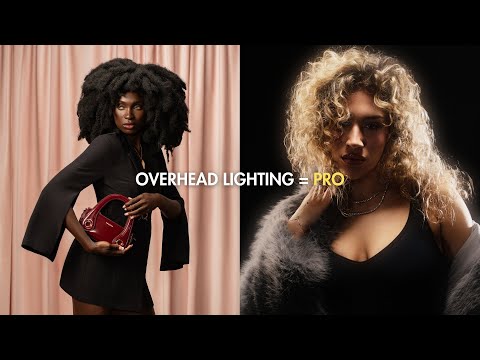
Here are the defining visual characteristics you can expect from a frontal lighting arrangement:
- Minimal to no shadows on the subject’s face or front surface
- Even exposure across the subject with reduced contrast
- Rich color saturation and detail reproduction
- A clean, polished, and professional look
- Less texture visible on surfaces like skin, fabric, or landscapes
When and Why to Use Frontal Lighting
Not every shoot benefits from dramatic side or backlighting. Sometimes the best choice is a direct, front-facing light source—and knowing why is what separates a competent photographer from a great one.
Ideal Subjects for Frontal Lighting Setup
Frontal illumination shines (no pun intended) in several specific scenarios:
- ID and passport photography: The most common real-world application is government and corporate ID photography, where even, shadow-free illumination ensures the subject’s face is captured accurately with no misleading shadows.
- Product photography for e-commerce: When you need to showcase every detail of a product—its color, texture, label, and finish—front-facing light ensures consistency across your catalog.
- Group portraits and large gatherings: Positioning a flash or softbox directly in front of a group ensures every face receives adequate light, which is much harder with angled lighting setups.
- Architectural and real estate photography: Frontal light can reveal the full surface of a building facade evenly, making it useful for interior or exterior listings.
- Beginner portrait sessions: New photographers often struggle with complex lighting ratios. A frontal setup removes that learning curve and delivers pleasing, well-exposed portraits immediately.
How to Set Up Frontal Lighting Like a Pro
Setting up frontal lighting is deceptively simple, but small adjustments make a huge difference. Here’s how to approach it at every skill level.
Beginner Setup
Start with a single strobe or continuous LED panel placed directly in front of your subject, roughly centered on the camera’s optical axis. Use a softbox or diffusion panel to wrap the light evenly. Keep the light source at least three to four feet away from the subject to avoid harsh, direct illumination. Set your camera’s exposure for the ambient light first, then add the flash as the primary or fill light.
Intermediate Modifications

Once you’re comfortable with the basic setup, try these refinements:
- Offset the light slightly off-axis (a few degrees to the left or right) to introduce subtle shadow modeling while keeping the overall frontal character.
- Use a bounce card or reflector on the opposite side to fill any emerging shadows gently.
- Experiment with the light’s distance—moving it closer increases softness, while moving it back adds a bit more contrast and directionality.
- Combine frontal key light with a separate background light to add depth without altering the subject’s frontal illumination.

Advanced Techniques
Advanced photographers often use frontal lighting as a baseline and layer additional sources around it. You might add a hair light or rim light behind the subject to separate them from the background, creating a subtle halo effect. Another technique involves using grids or snoots on frontal lights to control spill and maintain a polished, editorial look. Some studio photographers also use frontal lighting with a colored gel to create a specific mood or brand-consistent palette across a product series.
Frontal Lighting vs. Other Lighting Positions
To truly understand front lighting photography, it helps to compare it directly with other common lighting positions. The table below summarizes the key differences.
| Lighting Position | Shadow Pattern | Best For | Mood |
| Frontal Lighting | Minimal, shadows behind subject | ID photos, products, groups | Clean, even, professional |
| Side Lighting | Strong contrast on one side | Dramatic portraits, texture emphasis | Moody, dramatic, artistic |
| Back Lighting | Subject silhouetted, rim highlight | Creative portraits, lens flare | Dreamy, ethereal, cinematic |
| Rembrandt Lighting | Triangle of light on shadow side | Classic portraits, editorial | Classic, sophisticated, timeless |
| Butterfly Lighting | Shadow under nose, butterfly shape | Fashion, glamour portraits | glamorous, high-fashion |
As you can see, frontal illumination occupies a unique niche. It’s the most forgiving and predictable of all lighting positions, which makes it an essential tool in any photographer’s arsenal—even if it’s not always the most exciting choice on its own.
Expert Tips and Common Mistakes
Even though frontal lighting is straightforward, there are pitfalls that trip up photographers at every level. Here are some expert recommendations to keep in mind.
- Always diffuse your light source. A bare flash pointed directly at your subject from the front creates harsh specular highlights and unflattering hotspots. A softbox, umbrella, or even a white bedsheet stretched over a frame dramatically improves the quality of frontal illumination.
- Watch for flatness in portraits. Because frontal light minimizes shadows, it can make faces look two-dimensional. If you’re doing portrait photography, consider adding a subtle fill card or bounce reflector at a slight angle to reintroduce a bit of modeling.
- Mind the catchlights in the eyes. With a directly frontal light source, catchlights tend to be centered in the iris, which looks natural and engaging. This is actually a subtle advantage of front lighting over some off-axis setups.
- Use exposure compensation. Frontal lighting can fool your camera’s meter into underexposing the subject if the background is bright. Always check your histogram and adjust accordingly.
- Avoid mixing color temperatures. Frontal light combined with mixed ambient sources (like daylight from a window and tungsten room lighting) can create color casts that are difficult to correct in post-production.
Frequently Asked Questions
Q: What is frontal lighting best used for in photography?
A: Frontal lighting is best used for situations where you need even, shadow-free illumination across your subject. This includes ID and passport photography, product catalogs, group portraits, and beginner portrait sessions where you want a clean, professional look without the complexity of advanced lighting setups.
Q: How does frontal lighting affect portrait photography differently than side lighting?
A: Frontal lighting illuminates the subject face-on, minimizing shadows and creating a flat, even appearance that highlights every detail. Side lighting, on the other hand, creates dramatic shadow gradients across the face, adding depth, texture, and a moodier artistic quality. The choice between the two depends entirely on the emotional tone and purpose of the portrait.
Q: Can frontal lighting be used outdoors, or is it only for studio work?
A: Frontal lighting can absolutely be used outdoors. You can position a flash or LED panel directly in front of your subject to fill harsh midday shadows or to add light during golden hour when the sun is low and creating unflattering under-eye shadows. Many outdoor photographers use frontal fill flash as a go-to technique for travel and event photography.
Q: What equipment do I need for a basic frontal lighting setup at home?
A: For a basic home setup, you need a single flash or LED light source, a light stand, a softbox or diffusion modifier, and a light mount or hot shoe adapter. If you don’t have a flash, a continuous LED panel with a built-in diffuser works perfectly for learning the principles of front illumination photography on a budget.
Q: Why does frontal lighting sometimes make subjects look flat or lifeless?
A: Because frontal illumination hits the subject evenly from the front, it reduces shadow contrast and surface texture, which can result in a flat appearance. This is especially noticeable in portrait photography where dimensionality adds character. To counteract this, try slightly angling the light off-axis, adding a hair light, or using a reflector to reintroduce subtle shadow modeling.
Q: How can I make frontal lighting look more creative and less basic?
A: Add depth by layering a secondary light source behind or to the side of your subject, use colored gels on your frontal light for a stylized look, or combine frontal illumination with interesting backdrops and props. Even simple tweaks like changing the light’s angle by just 10 to 15 degrees off the camera axis can transform a basic frontal setup into something with visual interest and professional polish.
Final Thoughts
Frontal lighting photography remains one of the most versatile and practical techniques in a photographer’s toolkit. It might not always be the most creative or dramatic option, but its reliability, simplicity, and flattering evenness make it indispensable for professional work, studio sessions, and everyday shooting alike. Whether you’re capturing a passport photo, a product for an online store, or a candid group shot at a family gathering, mastering the frontal lighting position gives you a solid foundation from which you can branch into more complex setups with confidence. Start with the basics, experiment with modifiers and angles, and you’ll quickly discover that even the simplest light placement can produce stunning, polished results when applied with intention and skill.