


LED light panel photography has revolutionized the way photographers approach lighting, whether they are shooting portraits, products, or cinematic video content. Unlike traditional strobes and speedlights, LED panels offer continuous, adjustable illumination that gives creators real-time control over their lighting setup. This guide dives deep into everything you need to know about LED light panels for photography — from choosing the right one and setting up your first rig to advanced techniques that will elevate your work to a professional level.
What Is an LED Light Panel in Photography?
An LED light panel is a flat, portable lighting device that uses light-emitting diodes to produce a consistent, flicker-free light source. These panels come in various sizes, color temperatures, and brightness levels, making them incredibly versatile for different genres of photography and videography. The best LED light panels for photography allow you to dim, change color temperature, and sometimes even shift hues — all from a single unit.
Key benefits of LED panels over traditional strobes:
- Continuous lighting lets you see exactly how shadows and highlights fall before pressing the shutter
- No recycling time — you can shoot as fast as your camera allows
- Lower power consumption and portable battery options for on-location work
- Cooler operating temperatures, making them safer for extended shoots
- Ideal for video photographers who need constant illumination
Types of LED Light Panels for Photography
Not all LED panels are created equal. Understanding the different categories helps you choose the right tool for your specific workflow.
1. Small Portable LED Panels
These are compact units, often powered by rechargeable batteries or USB-C, designed for on-the-go photographers. Brands like Aputure, Godox, and Nanlite manufacture pocket-sized panels that punch far above their weight in brightness. They are ideal for travel photographers, vloggers, and anyone who needs a lightweight fill light.

2. Medium-Sized Rectangular Panels
The workhorses of LED photography lighting. These panels typically range from 12×12 inches to 24×24 inches and offer higher output with built-in diffusion. They are the go-to choice for portrait photographers and studio shooters who need soft, even illumination across a subject.
3. Large Softbox-Style LED Panels
These units integrate a softbox or diffuser directly into the panel design, creating an expansive, wraparound light source. They are particularly popular for beauty photography, product shots, and headshot work where the quality and softness of light are paramount.
4. RGB and Tunable White LED Panels
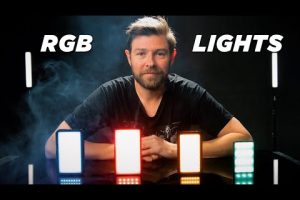
Advanced panels offer full RGB color mixing or at minimum tunable white temperature adjustment. This means you can match any ambient lighting condition or add creative colored accents to your scene — a feature that video creators and conceptual photographers find indispensable.
How to Choose the Best LED Light Panel for Your Needs
Selecting the right panel depends on several factors that go beyond just price. Here is what you should evaluate before making a purchase:
- Brightness Output (Lux and Lumens): Check the maximum luminance output. Panels rated between 5,000 and 10,000 lux at one meter are suitable for most portrait and product work. High-output units exceeding 20,000 lux can handle outdoor daylight balancing.
- Color Temperature Range (CCT): Look for panels offering a wide CCT range, ideally from 2,700K to 6,500K. Tunable white panels let you match warm tungsten indoor light or cool daylight seamlessly.
- CRI (Color Rendering Index): A CRI of 95 or above ensures accurate skin tones and true-to-life color reproduction. Panels with a CRI below 90 can introduce unwanted color casts, especially in portraits.
- Dimming and Flicker-Free Operation: Make sure the panel offers smooth dimming without visible flickering, which can cause banding in video footage.
- Battery and Power Options: V-mount batteries, NP-F batteries, or USB-C PD charging all offer different levels of portability. Consider where and how you will be shooting.
- Build Quality and Mounting Options: Cold shoes, 1/4-inch threads, and magnetic mounts determine how versatile your panel is in the field.
Setting Up LED Panels for Portrait Photography
Portrait photography with LED panels requires a deliberate approach to light placement and modification. Here is a practical setup workflow that works across most scenarios.

Step 1: Position Your Key Light
Place your primary LED panel at roughly a 45-degree angle to one side of your subject, slightly above eye level. This creates natural-looking shadows that add depth and dimension to the face. Use a softbox attachment or a diffusion layer to soften the light and reduce harsh shadows.
Step 2: Add a Fill Light or Reflector
On the opposite side, position a second LED panel at reduced power, or use a simple white reflector to bounce light back into the shadow areas. The ratio between your key and fill light determines the mood — a 2:1 ratio produces soft, flattering portraits, while a 4:1 or 5:1 ratio creates dramatic, high-contrast images.
Step 3: Use a Backlight or Rim Light
A third LED panel positioned behind the subject adds separation from the background and creates a beautiful hair or shoulder rim. This technique, often called “edge lighting” or “accent lighting,” instantly elevates the professional quality of your portraits.
LED Light Panel Photography for Product and Commercial Work
Product photography demands precision, and LED panels excel here because of their consistency. When shooting products on a light table or in a studio setting, you can fine-tune the intensity and angle of each panel independently.
| Product Category | Recommended Panel Size | Light Setup | Key Consideration |
| Jewelry and Small Accessories | Small (10×12 inches) | Overhead + two side panels | High CRI for accurate gemstone and metal reflections |
| Cosmetics and Beauty Products | Medium (18×18 inches) | Large softbox-style panel overhead | Soft, even light with no hard shadows |
| Electronics and Tech Products | Medium to Large | Two angled panels + reflective backdrop | Avoid hotspots on glossy surfaces |
| Food and Beverage | Medium (12×16 inches) | Overhead diffused panel + side accent | Tunable white to match mood and plating |
Advanced LED Panel Photography Techniques
Once you are comfortable with basic setups, these advanced techniques will help you push your creative boundaries.

Light Painting with LED Panels
Because LED panels emit continuous light, they are perfect for light painting during long exposures. Mount your panel on a stand or hold it manually, then move it across the frame during a 10–30 second exposure. You can “paint” light onto specific areas of a landscape, building, or subject for dramatic, artistic results.
Color Grading and Creative Lighting
RGB LED panels allow you to introduce colored light that matches or contrasts with your scene’s ambient tones. For example, a deep blue backlight paired with warm ambient light creates a cinematic look that is highly sought after in modern portrait and editorial photography.
High-Speed Sync-Free Flash Alternative
Because LED panels produce continuous light, there is no need for high-speed sync considerations. You can shoot at your camera’s maximum shutter speed (often 1/8000s) without any light loss, giving you greater control over ambient exposure while keeping your LED panels at a manageable output level.
Panel Modifier Compatibility
Many professional LED panels accept standard modifiers including softboxes, snoots, barn doors, and grid attachments. Adding a small softbox to a rectangular panel can dramatically change the quality of light, making it nearly indistinguishable from a dedicated studio strobe with a modifier.
Common Mistakes to Avoid When Using LED Panels
- Placing panels too close without diffusion: This creates hard, unflattering shadows and hotspots on skin or reflective surfaces.
- Ignoring ambient light balance: LED panels look great in isolation, but mixing them with existing window light or ambient sources without adjusting color temperature can lead to inconsistent white balance.
- Underestimating power needs: Small panels may look bright on camera preview but lack the output needed for outdoor shoots or fast shutter speeds.
- Neglecting CRI ratings: A cheap panel with a low CRI will distort colors, especially in skin tones and colored objects.
- Overlooking battery life: Bright panels drain batteries quickly. Always carry backup power or use AC adapters for longer sessions.
Top Recommended LED Light Panels in 2024 and Beyond
While the market is saturated with options, a few panels consistently stand out for photographers seeking reliability, output, and value. The Aputure 300d Mark II and Godox SL-200 II are widely regarded as excellent mid-range options. For budget-conscious creators, the Neewer 660 LED Panel delivers impressive output at a fraction of the cost. High-end professionals often turn to the Aputure Light Storm series or the Quasar Science linear rails for large-scale commercial work.
Conclusion
LED light panel photography offers an unmatched combination of flexibility, portability, and creative control that suits virtually every genre of photography and videography. Whether you are a beginner building your first lighting kit or a seasoned professional refining a studio setup, investing in quality LED panels will transform the way you shape light. Start with one reliable panel, learn the fundamentals of light placement, and gradually expand your kit as your skills and ambitions grow. The continuous, predictable nature of LED lighting means you spend less time guessing and more time creating.
Frequently Asked Questions
What is the best LED light panel for beginner photography?
Beginners should look for a compact, tunable white LED panel with at least a CRI of 90 and adjustable brightness. The Godox ML60 or the Neewer 660 LED Panel are popular starting points that offer excellent output and build quality without overwhelming complexity or cost.
Can LED light panels be used for outdoor photography?
Absolutely. LED panels are highly effective for outdoor photography, especially when you need to fill shadows or add a specific color tone to your subject. However, for outdoor use, you will want a high-output panel (at least 5,000 lux) to compete with ambient sunlight. Many photographers pair outdoor LED panels with V-mount batteries for full mobility.
How do LED panels compare to strobe lights for studio photography?
LED panels provide continuous light, which helps with previewing and composition, while strobe lights deliver a powerful burst of light that can freeze motion more effectively. For portraits, LED panels are often preferred for their ease of use and real-time feedback. For high-speed or action photography, strobes remain the stronger choice.
What size LED panel is best for product photography?
A medium-sized rectangular panel (18×18 inches or similar) with a built-in diffusion layer is ideal for most product photography setups. Smaller panels work well for detailed close-ups of jewelry or cosmetics, while larger panels provide more even coverage for bigger products.
Do LED light panels affect camera white balance?
Yes, LED panels emit light at specific color temperatures, so they do influence your camera’s white balance settings. Most modern LED panels offer tunable white temperature, allowing you to match the color temperature of your panel to your ambient lighting or set it manually in your camera for consistent, accurate results.
Are battery-powered LED panels bright enough for professional work?
Modern battery-powered LED panels can deliver professional-grade output, especially models rated at 10,000+ lux or higher. The key is to manage expectations based on battery mode — many panels run at reduced brightness on battery power compared to AC adapter mode, so plan your power setup accordingly for critical professional shoots.