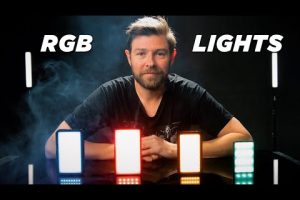



If you are serious about photography—whether you are shooting portraits, products, or cinematic video content—your lighting setup can make or break your final image. Among the many lighting options available today, LED light for photography has emerged as the undisputed favorite for professionals and hobbyists alike. Unlike traditional strobes or incandescent bulbs, LED panels deliver consistent, adjustable, and energy-efficient illumination that lets you see exactly how your light will look before you even press the shutter. This comprehensive guide explores everything you need to know about choosing, using, and maximizing LED lighting for stunning photographic results.

Why LED Lights Have Become the Go-To Choice for Photographers
The shift toward continuous LED lighting in the photography world did not happen by accident. Photographers and videographers discovered that LED panels offer a level of control and flexibility that traditional flash units simply cannot match in certain scenarios. One of the biggest advantages is real-time preview. With LED lights, you can see the shadows, highlights, and color grading on your subject live through your camera or in the viewfinder. This eliminates the guesswork that comes with studio strobes, where you often need to fire test shots and adjust on the fly.
Another major factor is color accuracy. Modern LED panels are engineered with high Color Rendering Index (CRI) and Television Lighting Consistency Index (TLCI) ratings, meaning they render skin tones, textures, and colors far more faithfully than older lighting technologies. For portrait photographers and product shooters, this translates to more natural and lifelike results straight out of the camera.
Energy efficiency and durability also play a significant role. LED lights consume a fraction of the power that traditional tungsten or fluorescent lights require, they produce minimal heat, and their lifespan often exceeds 50,000 hours. For photographers working on tight budgets or in remote locations, these practical benefits make LED panels an increasingly smart investment.
Types of LED Lights for Photography
Not all LED lights are created equal, and understanding the different categories on the market is essential for making an informed purchase. Below are the most common types of LED lighting used in photography today, each suited to specific applications and skill levels.
LED Panels

LED panels are flat, rectangular light sources that come in a variety of sizes—from compact handheld units to large studio panels. They are perhaps the most versatile option, offering adjustable brightness and often variable color temperature controls. Panels like the Aputure Amaran series or the Godox SL60W have become staples in both photography and videography setups. Their flat form factor makes them easy to mount on light stands, attach to cameras, or position inside softboxes and diffusers.
LED Light Sticks and Tubes
Also known as LED tubes or light sticks, these elongated, tube-shaped lights are ideal for creative lighting effects, edge lighting, and accent illumination. Popular brands like Nanlite and Aputure offer RGB and RGBWW tubes that allow you to produce virtually any color. They are lightweight, battery-powered options for on-location shoots, and they give photographers a cinematic edge that is difficult to achieve with conventional strobes.
Ring Lights
Ring lights are circular LED panels that surround the camera lens, casting even, shadowless illumination directly onto the subject. They are extremely popular in portrait photography, beauty shots, and social media content creation. While they produce a distinctive catchlight in the subject’s eyes and a flattering, wrap-around light, they lack the directional control that other LED formats offer, making them less suitable for dramatic or editorial-style work.
COB (Chip-on-Board) LED Lights
COB LEDs pack thousands of tiny LED chips into a single dense module, producing an intense, focused beam of light with excellent uniformity. These are the workhorses of professional video and photography lighting. COB lights like the Aputure 300d II or the Quasar Science Q-LED deliver output levels that rival traditional studio strobes while maintaining the benefits of continuous light.
How to Choose the Right LED Light for Your Photography Needs
Selecting the best LED light for your specific photography style requires careful consideration of several technical and practical factors. Here is what you should evaluate before making a purchase.
- Color Temperature Range: Look for bi-color LED panels that allow you to adjust the color temperature across a wide range, typically from 2700K to 6500K. This flexibility lets you match ambient light or create warm, cool, or neutral lighting moods without buying multiple light sources.
- Brightness and Dimming: Check the light’s maximum output measured in lux or lumens and ensure its dimming range is smooth and flicker-free. A panel with 10-bit or 12-bit dimming gives you granular control over intensity, which is critical for long-exposure photography and video work.
- Color Rendering Index (CRI) and TLCI: A CRI rating of 95 or above is considered excellent for photography. Higher CRI values mean more accurate color reproduction, especially for skin tones and saturated colors. The TLCI score, specific to television and cinematic lighting, is an additional quality indicator worth checking.
- Light Modifier Compatibility: Choose LED lights that are compatible with softboxes, barn doors, diffusion filters, and reflectors. The ability to shape and control the light is just as important as the light source itself.
- Power Source: Consider whether you need a battery-powered option for location shoots or a AC-powered unit for the studio. Some panels support both, giving you maximum versatility.
LED Light vs. Traditional Lighting: A Comparison
To help you understand where LED lighting stands relative to other common options, here is a direct comparison across key performance areas.
| Feature | LED Panels | Studio Strobes | Tungsten Lights |
| Real-Time Preview | Yes | No (test flash needed) | Yes |
| Color Temperature Adjustability | Full range (bi-color) | Fixed (unless gels used) | Fixed warm tone |
| Heat Output | Very low | Minimal (flash only) | High |
| Power Consumption | Low | High (per flash) | High |
| Lifespan | 50,000+ hours | Long (flash tubes) | Shorter (filament burnout) |
| Portability | Excellent | Moderate | Poor (heavy, fragile) |
| Cost per Unit | Mid to high | Mid | Low to mid |
As the table illustrates, LED lights offer the best balance of versatility, efficiency, and modern features. While studio strobes still hold an edge in raw power for freezing fast motion, LED technology has closed that gap significantly, with high-output COB units now capable of powering shots at lower ISOs and faster shutter speeds.
Expert Tips for Getting the Best Results with LED Lighting
Simply owning a quality LED panel does not automatically guarantee beautiful photographs. How you set up, modify, and balance your light makes all the difference. Here are some expert recommendations to elevate your LED-lit images.
- Use diffusion panels or softboxes: Raw LED output can be harsh and directional. Adding a diffusion layer softens the light, reduces hard shadows, and creates a more flattering illumination on skin and surfaces.
- Balance ambient and artificial light: When shooting in mixed lighting environments—such as a window-lit room with LED panels—match the color temperature of your LED light to the natural light source to avoid color casts and inconsistent white balance.
- Position lights at 45-degree angles: This classic portrait lighting angle creates natural-looking shadows and depth on the subject’s face, avoiding the flat, unflattering look that comes from placing a light directly in front of the subject.
- Use a gray card or white balance preset: Even with high-CRI LED lights, always set a custom white balance based on your specific lighting conditions to ensure color accuracy in post-production.
- Experiment with the inverse square law: Understand that light intensity drops off dramatically as distance increases. Moving your LED light even six inches closer or farther from your subject can significantly change the exposure and the quality of the light fall-off.
- Layer multiple light sources: For more advanced setups, combine a key light, a fill light, and a backlight or rim light using different LED panels. This three-point lighting technique adds dimension, separation, and professional polish to your images.
Frequently Asked Questions
What LED light is best for beginner photographers?
For beginners, a bi-color LED panel with adjustable brightness and a CRI rating above 90 is the ideal starting point. Options like the Godox SL60W or Neewer 660 LED panels offer excellent value, portability, and enough power to shoot portraits and small product setups without overwhelming complexity.
Can LED lights be used for video and photography simultaneously?
Absolutely. In fact, most modern LED panels designed for photography are also optimized for video production. The continuous output, flicker-free dimming, and adjustable color temperature make them equally effective for both still and motion capture, which is why many videographers and photographers share the same lighting gear.
How many watts of LED light do I need for a small studio setup?
For a small studio or home setup, a 50-watt to 100-watt LED panel is typically sufficient for one or two subjects. If you are working with larger groups or need to cover wider scenes, consider using multiple lower-wattage panels at different angles rather than relying on a single high-powered unit.
Do LED lights flicker, and does it affect my photos?
Lower-quality LED lights can exhibit flickering that appears as banding or streaks in your images, especially at certain shutter speeds. High-end LED panels with high-frequency dimming circuits eliminate flicker entirely. When shopping, look for panels that specify flicker-free operation at all dimming levels, particularly if you plan to shoot video.
What is the difference between CRI and TLCI?
CRI (Color Rendering Index) measures how accurately a light source reproduces colors compared to natural sunlight, with a maximum score of 100. TLCI (Television Lighting Consistency Index) is a metric specifically developed for the television and film industry, evaluating how a light source performs under camera sensors. While CRI is more relevant for still photography, TLCI provides additional insight into how a light will render on video, and the best LED panels score highly on both scales.
Conclusion
LED light for photography represents the most practical, versatile, and future-proof lighting solution available to photographers today. Whether you are a beginner building your first setup or an experienced professional refining a high-end studio, LED panels and COB lights give you the precision, consistency, and creative freedom that modern photography demands. By understanding the types of LED lights available, choosing the right specifications for your workflow, and applying expert lighting techniques, you can dramatically improve the quality and impact of every image you capture. Invest in quality LED lighting, experiment with modifiers and positioning, and watch your photography reach a whole new level of excellence.