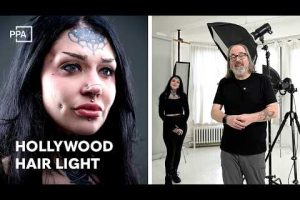



Hard lighting in photography is one of the most powerful — and often misunderstood — lighting techniques available to photographers. Whether you are a portrait artist looking to carve out dramatic shadows, a fashion shooter chasing editorial contrast, or a cinematographer trying to recreate that classic film noir aesthetic, understanding hard light is essential. Unlike its softer counterpart, hard lighting produces sharp, well-defined shadows, high contrast between highlights and darks, and an unmistakable sense of drama. In this comprehensive guide, we will break down exactly what hard light is, how it works, when to use it, and how you can master it in your own photography — from beginner setups to advanced lighting diagrams that push creative boundaries.
What Is Hard Lighting in Photography?
Hard lighting refers to a type of illumination that creates harsh, sharply defined shadows with minimal transition between the lit areas and the dark areas of an image. This happens when the light source is relatively small compared to the subject, or when the light is highly directional without diffusion. The result is a high-contrast image where every texture, wrinkle, contour, and imperfection becomes visually prominent. In technical terms, hard light produces specular highlights and steep shadow gradients that give photographs a bold, graphic quality. Photographers who specialize in dramatic portrait photography, fashion editorial lighting, and cinematic lighting setups rely heavily on hard light to communicate mood, tension, and visual intensity.
How Hard Lighting Differs from Soft Lighting
Understanding hard light becomes much easier when you compare it directly to soft light. The core difference lies in the transition zone between the brightest part of the image and the shadow area. Soft light wraps around the subject gradually, creating gentle gradients and barely visible shadow edges. Hard light does the opposite — it punches straight through and carves out deep, angular shadows with a clear, abrupt boundary.
The Role of Light Source Size
The single most important factor determining whether light is hard or soft is the relative size of the light source compared to your subject. A small, bare strobe fired without any modifier is a tiny light source relative to a human face, which means it casts hard shadows. A massive octabox or a cloudy sky, by contrast, acts as a broad, diffused source that wraps light around the subject and produces soft, flattering shadows. The distance also matters — moving a light source closer makes it effectively larger relative to the subject, softening the light, while moving it further away shrinks its relative size and increases hardness.
Shadow Characteristics
With hard lighting, you will notice several distinct shadow behaviors that set it apart from soft light setups:
- Sharp shadow edges — The boundary between the highlight and shadow is crisp and well-defined.
- Deep shadow areas — Shadows tend to be darker and less filled with ambient or bounced light.
- Highlight detail — Specular highlights are bright, concentrated, and small on the subject’s surface.
- Texture emphasis — Skin pores, fabric weave, and surface details become more pronounced in the shadow regions.
When to Use Hard Lighting in Photography

Hard light is not inherently “bad” — it is a creative choice that serves specific artistic and commercial purposes. Knowing when to deploy hard light versus soft light separates a technically competent photographer from a visually intentional one.
Portrait Photography
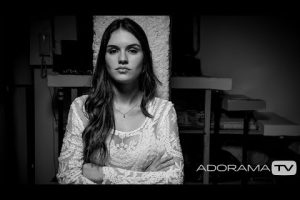
Many iconic portrait photographers have used hard light to create unforgettable images. Think of the Rembrandt lighting pattern, where a single, undiffused light source creates a triangle of light on the shadow-side cheek. This technique adds depth, dimensionality, and a sense of gravitas to portraits. Hard light in portraiture works exceptionally well for male subjects, mature models, and images that need to communicate strength, authority, or raw emotion. The key is to position the light source at an angle — typically 45 to 90 degrees off-axis — so that the shadows sculpt the face rather than flatten it.
Fashion and Editorial Work
The fashion industry has long embraced hard lighting for its ability to make clothing, jewelry, and accessories “pop” against a dark or neutral background. Editorial photographers frequently use bare bulbs, focused spots, and grid-mounted strobes to create high-contrast imagery that commands attention on magazine covers and lookbook spreads. The harsh shadows emphasize the structure of garments and create a sense of editorial edge that soft, wrap-around lighting simply cannot replicate.
Drama and Cinematic Effects
If you are shooting in a style inspired by film noir, German expressionism, or modern thriller aesthetics, hard lighting is your best friend. The stark contrast between light and dark zones creates visual tension and tells a story before the viewer even registers the subject’s expression. Cinematic lighting techniques like split lighting, butterfly lighting with a bare reflector, and single-source rim lighting all depend on hard or semi-hard light to achieve their signature look.
How to Create Hard Lighting Setups

Setting up hard light is surprisingly straightforward, which is part of what makes it so accessible for beginners while still offering depth for advanced practitioners.
Using Bare Strobes and Speedlights
The simplest path to hard light is to fire your strobe or speedlight with no modifier at all — no softbox, no umbrella, no diffusion panel. A bare flash head produces a small, intensely directional source that casts sharp shadows immediately. This is the starting point for many lighting tutorials and is an excellent exercise for understanding how light falls on different face shapes and body angles.
Direct Natural Light
You do not need artificial gear to work with hard light. The midday sun, especially when it is high in the sky with no clouds, acts as an extremely hard light source. The sun itself is a massive emitter, but from Earth’s perspective, it is effectively a small, distant point source. Shooting in direct midday sun produces the kind of harsh, top-down shadows that are challenging but can be used creatively — for example, positioning your subject so that the harsh shadows fall across their face in a way that adds character rather than distraction.
Snoots, Grids, and Flags
For more controlled hard light, accessories like snoots and grids narrow the beam of your strobe into a tight, focused pool of light. A grid modifier attaches to the front of a speedlight or strobe and restricts the spread of light to a narrow cone, increasing the hardness of the shadow edges. Flags and barn doors work in the opposite direction — they block spill light and prevent unwanted fill, keeping your shadows crisp and defined. These tools are staples of studio lighting setups for advertising, product photography, and portrait work.
Hard Lighting vs Soft Lighting: A Comparison
| Attribute | Hard Lighting | Soft Lighting |
| Shadow Edge Quality | Sharp, well-defined | Gradual, feathered |
| Contrast Ratio | High contrast | Low to moderate contrast |
| Light Source Size (relative) | Small | Large |
| Best For | Drama, texture, mood | Flattery, beauty, products |
| Shadow Depth | Deep, dark shadows | Shallow, filled shadows |
| Setup Complexity | Minimal — often modifier-free | Requires diffusion or large modifiers |
| Skin Flattery | Emphasizes texture and imperfections | Smooths and flatters skin |

Expert Tips for Mastering Hard Light
Mastering hard lighting takes practice, but these expert-level insights will accelerate your learning curve significantly:
- Start with one light only. The beauty of hard light is its simplicity. A single bare flash or strobe is enough to create a compelling, high-contrast image. Resist the urge to add fill lights until you understand how your single source behaves.
- Pay attention to the angle of incidence. The angle at which light hits your subject determines where the shadows fall. A 90-degree side light creates dramatic split lighting, while a 45-degree angle produces classic Rembrandt-style shadows.
- Use negative fill intentionally. Place black flags or dark cards on the shadow side of your subject to deepen the contrast and prevent unwanted ambient fill from softening your hard shadows.
- Position the light further away for even harder light. Moving a small source further from the subject makes it effectively smaller relative to the subject, which increases shadow hardness.
- Shoot in RAW. Hard light images have extreme dynamic range. Shooting in RAW gives you the latitude to recover shadow detail or tame blown highlights during post-processing.
- Experiment with reflectors for fill control. A white reflector placed opposite your hard light source can add a subtle fill that lifts shadows just enough to retain detail without losing the dramatic contrast you are after.
Common Mistakes to Avoid When Using Hard Light
Even experienced photographers can fall into traps when working with hard lighting setups. The most common mistakes include placing the light too close to the subject without accounting for the resulting feathering, failing to flag or block stray light that kills your shadow contrast, and using hard light on subjects who have skin texture concerns that do not match the intended mood of the shoot. Another frequent error is ignoring the background — hard light creates deep shadows not only on the subject but also on the backdrop, which can either enhance or ruin your composition depending on the tonal relationship between the two.
Frequently Asked Questions About Hard Lighting
1. What is hard lighting used for in photography?
Hard lighting is used to create dramatic, high-contrast images with sharp shadows and intense highlights. It is especially popular in portrait photography for adding depth and mood, in fashion editorials for creating edgy, high-impact visuals, and in cinematic setups for evoking tension and atmosphere. It is also effective in product photography where you want to emphasize texture and surface detail.
2. How do you make hard lighting softer without losing the dramatic effect?
You can soften hard lighting slightly by moving the light source further away and then bringing it closer to the subject while using a small modifier like a bare reflector. Another technique is to use a black flag to block one side of the light, which narrows the effective source and maintains contrast while slightly reducing the harshness of the shadow edges. Adding a subtle bounce fill from a neutral surface can also lift the darkest shadows without fully eliminating them.
3. Is hard light or soft light better for portraits?
There is no universal “better” — it depends entirely on the mood and subject. Hard light is ideal for dramatic, masculine, or editorial portraits where texture and shadow play a key role. Soft light is generally more flattering for beauty, wedding, and family portraits where smooth skin tones and gentle transitions are desired. Many professional photographers use both in the same shoot, switching between hard and soft setups to create variety.
4. Can you use hard light with natural sunlight?
Absolutely. Direct, unfiltered sunlight — especially around midday when the sun is high and unobstructed — is one of the most common natural hard light sources. Photographers often seek out hard sunlight for outdoor portraits and street photography, using it to create bold shadows and strong contrast. Using a reflector or a simple white card on the shadow side can help manage the contrast without sacrificing the hard light aesthetic.
5. What equipment do I need for a basic hard lighting setup?
A basic hard lighting setup requires minimal gear: a flash unit (speedlight or strobe), a trigger or hot shoe mount, and optionally a bare reflector or a snoot modifier. You do not need softboxes, diffusion panels, or elaborate modifier kits to produce hard light. The less diffusion you use, the harder your light will be. A single bare speedlight fired directly at a subject is already a hard light source — the challenge is learning to control and position it effectively.
Conclusion
Hard lighting in photography is far more than a technical setup — it is a storytelling tool that gives photographers the power to shape mood, emphasize texture, and create images with undeniable visual impact. From a single bare flash in a dark studio to the unforgiving midday sun on an urban street corner, hard light challenges you to think critically about shadow placement, contrast control, and subject positioning. Whether you are just beginning your journey into controlled lighting or you are a seasoned professional refining your craft, investing time in understanding and practicing hard light will elevate your photography in ways that soft light alone cannot. The key is to experiment deliberately, observe how shadows behave in different environments, and develop an intentional approach to every lighting decision you make.