


When you step into high key light photography, you enter a realm of luminosity, purity, and ethereal beauty. Unlike dramatic shadows and deep contrasts, high key photography relies on a radiant, overexposed aesthetic to evoke joy, innocence, and elegance. This technique strips away distracting shadows, replacing them with a brilliant wash of light that makes subjects appear dreamlike. Whether capturing fashion portraits, children’s sessions, or product shots, mastering high key lighting transforms ordinary scenes into breathtaking visual narratives. Let’s dive deep into the mechanics, setups, and creative secrets that make this style a favorite among photographers worldwide.
The Essence of High Key Light Photography
At its core, high key lighting is a technique characterized by a predominance of light tones, minimal shadows, and bright overall exposure. The goal is to eliminate dark shadows and create an image that feels airy, clean, and optimistic. High key photography deliberately pushes exposure toward the highlights, intentionally over-exposing midtones and shadows just enough to achieve a luminous glow without blowing out the subject entirely. When executed correctly, resulting images feel weightless, vibrant, and instantly captivating. The technique has deep roots in fashion and beauty industries, where a flawless, glowing aesthetic is paramount, stripping away visual clutter to focus entirely on the subject’s emotion.
Defining High Key vs. Low Key
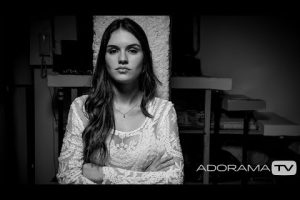
To appreciate high key lighting, understand its counterpart. While high key bathes the frame in light, low key photography is the dramatic opposite. Low key emphasizes deep shadows, dark tones, and high contrast using a single focused light source to create mood and mystery. High key is optimistic and clean; low key is intense and dramatic. Understanding this contrast helps photographers choose the right lighting setup depending on the emotional impact they want to deliver.
Essential Gear for High Key Lighting Setups
You do not need a massive studio budget to start experimenting with high key light photography, but you do need the right tools to control light precisely. The goal is to illuminate the background and subject evenly, minimizing harsh shadows. Here is the essential gear you will need to get started:

- Bright, Continuous Lights or Flashes: Softboxes and strip boxes are your best friends. They diffuse the light, creating a soft, wrap-around glow that eliminates hard shadows. Look for units with high wattage to overpower ambient light.
- A Seamless White Backdrop: A white cyclorama or seamless paper roll ensures the background reflects light evenly, preventing gray patches or creases. A true white backdrop is non-negotiable for authentic high key work.
- Light Stands and Clamps: You need to position your lights and background securely to handle the intensity of the setup.
- A Light Meter: Crucial for high key work, a reflected light meter helps you precisely measure the brightness of the background and the subject, ensuring the exposure is perfectly balanced.
- Camera with Manual Controls: You must have full control over aperture, shutter speed, and ISO to intentionally overexpose without losing detail in the brightest areas.
Setting Up Your High Key Studio
Setting up a high key lighting studio requires careful attention to placement and power ratios. The fundamental rule is to make the background brighter than the subject, or at least equally bright, to avoid a dark, moody backdrop that ruins the high key effect.
Beginner Setup: Soft and Simple
If you are just beginning, start with a simple two-light setup. Place a large white seamless backdrop about three to four feet behind your subject. Position two identical lights with softboxes on either side of the camera at 45-degree angles. Set both lights to the same power output. The key here is diffusion—use the interior of the softbox and add a scrim if necessary to ensure the light is gentle. Meter for the background first, making sure it reads one to two stops brighter than what your camera’s meter suggests for the subject. This ensures the background is pure white, and the subject is beautifully lit but not harshly blown out.

Advanced Setup: Controlling the Light Spill
As you progress, you will encounter challenges like light spilling onto the backdrop unevenly or creating hotspots on the subject. Advanced setups involve using flags and negative fill to sculpt the light. Flags are black cards placed to block light from hitting areas of the backdrop you want to remain pure white. You might introduce a third light, known as a hair light or rim light, to separate the subject from the background. Adjusting the power of this separation light creates a luminous halo effect that gives the subject dimension without introducing dark shadows. Using a gradient on the backdrop—brighter where the subject stands and slightly darker at the edges—adds professional depth to high key images.
High Key vs. Low Key Lighting Compared
To solidify your understanding, let us compare the two dominant lighting styles side by side.
| Feature | High Key Lighting | Low Key Lighting |
| Lighting Ratio | Low ratio; minimal difference between highlights and shadows | High ratio; large difference between highlights and shadows |
| Overall Mood | Cheerful, optimistic, ethereal, clean | Dramatic, mysterious, intense, moody |
| Background Tone | Bright white or very light gray | Dark black or very dark gray |
| Shadow Presence | Very few or no shadows; filled with light | Deep, hard shadows dominate the composition |
| Common Uses | Fashion, newborn, product, lifestyle | Film noir, portraits, dramatic fine art |
Post-Processing: The Secret Sauce
No high key lighting setup is complete without meticulous post-processing. Even with a perfect studio setup, you will likely need to tweak the exposure and tones in editing software like Adobe Lightroom or Capture One. The goal in post-production is to ensure the background is pristine white and the subject pops without looking overexposed. Start by lifting the highlights and whites in your RAW file to bring out the luminous quality. Then, carefully adjust the shadows to ensure they are clean and bright, but not completely eliminated, as some subtle shadow adds dimension. Dodging and burning can be used lightly to guide the viewer’s eye across the bright frame. Finally, pay close attention to skin tones; high key lighting can easily wash out complexions, so using calibration targets and subtle color grading ensures your subjects look naturally radiant rather than washed out.
Expert Tips for Flawless High Key Images
Mastering high key light photography is an art that requires finesse. Here are some expert recommendations to elevate your bright and airy images:
- Embrace Overexposure Intentionally: Do not fear pushing your exposure +1 or +2 stops. High key photography thrives on intentional overexposure, so trust your light meter and let the highlights bloom just enough to achieve that glowing aesthetic.
- Mind the Reflections: White backgrounds reflect light back onto the subject. If you are shooting portraits, this can create a subtle rim light on the hair and shoulders. Use this to your advantage, but be mindful not to overdo it.
- Control the Ambient Light: Turn off all ambient light in the room. Window light or room lamps will ruin your carefully controlled high key setup by introducing unwanted shadows and color casts.
- Use a Tethered Workflow: Shooting tethered to a large monitor allows you to see the exposure in real-time. It makes it infinitely easier to spot blown-out areas or subtle gray patches on the backdrop.
- Focus on the Catchlights: In a bright, washed-out image, the catchlights in the subject’s eyes become the primary focal point. Ensure your lights are positioned to create beautiful, sparkling catchlights that bring life to the bright frame.
Frequently Asked Questions About High Key Photography
What is the difference between high key lighting and normal lighting? Normal lighting aims for a balanced exposure with a full range of tones from shadows to highlights. High key lighting deliberately eliminates deep shadows and underexposed midtones, resulting in an image that is predominantly bright and luminous. It shifts the tonal curve upward, creating an ethereal and optimistic feel rather than a neutral, documentary look.
How do you achieve a high key look with natural light? You can achieve high key light photography outdoors by shooting during the golden hour or on an overcast day. Use a white reflector to bounce light back onto the subject’s shadow side, ensuring the face is evenly lit. Place the subject far enough from the background so sunlight illuminates the backdrop brightly, minimizing shadows.
Why does my high key photo look gray instead of bright white? If your background appears gray, your lighting is not powerful enough, or the background is too close to the subject. Light falls off rapidly over distance; the background needs to be further away from the subject and lit with more intensity than the subject to achieve that pure, blown-out white. Additionally, a dirty or wrinkled seamless paper will reflect light unevenly, creating unwanted gray patches.
What camera settings are best for high key lighting setups? For bright and airy high key images, use a wide aperture like f/2.8 or f/4 to create a soft background blur, set your ISO to the base level (100 or 200) for maximum dynamic range, and use a slower shutter speed if necessary to allow more light in. Overexpose by one to two stops from your camera’s suggested metering to achieve the signature high key glow.
Is high key lighting suitable for all types of portrait photography? High key lighting is incredibly flattering for fashion, newborn, and beauty photography because it minimizes skin imperfections and creates a soft, heavenly glow. However, it is less suitable for dramatic portraits, fine art nudes, or storytelling images that rely on deep shadows and contrast to convey complex emotions or narratives.
Conclusion
High key light photography is more than just a lighting technique; it is a visual language that speaks to joy, purity, and clarity. By mastering light and exposure, you transform a simple studio setup into a canvas of radiant beauty. From the beginner’s first tentative steps with two softboxes to the advanced practitioner’s meticulously sculpted light gradients, the journey into high key imagery is endlessly rewarding. Embrace the brightness, control the shadows, and let your subjects shine with an unmistakable luminosity. As you integrate these techniques into your creative workflow, you will discover that high key photography does not just capture an image—it illuminates a feeling.