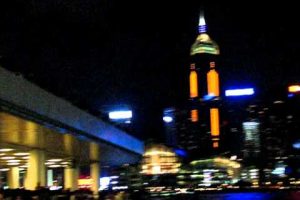



There is something deeply magnetic about capturing a harbour at night — the way warm lights ripple across dark water, the silhouette of a lighthouse cutting through mist, or the gentle glow of dock lamps painting golden streaks on old stone quays. Harbour light photography is one of the most rewarding niches in coastal and maritime imaging, blending technical precision with emotional storytelling. Whether you are a beginner shooting your first long exposure of a lighthouse beam or an experienced photographer refining your harbour light painting technique at golden hour, this guide covers everything you need to elevate your seaport light photography from snapshots to gallery-worthy images.
What Is Harbour Light Photography?
Harbour light photography refers to the art and technique of photographing illuminated waterfront scenes — lighthouses, dock lights, moored boats, and coastal infrastructure — often during twilight, blue hour, or after dark. This genre sits at the intersection of seaport light photography, maritime photography, and long exposure coastal imaging. Unlike traditional landscape photography, harbour light photography demands a nuanced understanding of artificial light sources, water reflections, and the interplay between natural ambient light and human-made illumination.
The appeal lies in the contrast. A dark harbour basin lit by a single sodium-vapor lamp creates drama that a midday seascape simply cannot replicate. Lighthouse long exposure tips and port light photography techniques help photographers harness this contrast to produce images rich in colour, texture, and atmosphere.
Essential Gear for Shooting Harbour Lights
You do not need an expensive rig to start with harbour light photography, but having the right equipment makes a significant difference. Here is what most experts recommend:
- Sturdy tripod: Long exposures — often 10 to 30 seconds or more — require absolute stability. A carbon fibre tripod reduces vibration and handles coastal wind better than aluminium.
- Wide-angle lens (14–24mm): Wide apertures and short focal lengths let you capture the full sweep of a harbour, including light trails and reflections across the water.
- Neutral density (ND) filters: A 6-stop or 10-stop ND filter allows you to use longer shutter speeds even when residual ambient light remains during twilight.
- Remote shutter release or intervalometer: Eliminates camera shake during extended exposures.
- Full-frame or APS-C camera with good low-light performance: Sensors with strong high-ISO capabilities preserve detail in shadowed harbour areas.
- Lens cleaning cloth: Sea spray and mist will coat your front element quickly — keep it accessible.
Camera Settings and Techniques by Skill Level
Beginner: Getting Started with Harbour Night Photography
If you are new to lighthouse long exposure tips, start with these foundational settings:
- Shoot in manual mode (M) so you control every variable.
- Set ISO to 100–400 to minimise noise and preserve shadow detail.
- Use a narrow aperture (f/8–f/16) for maximum depth of field across the harbour scene.
- Start with a 10–15 second shutter speed and adjust based on your preview.
- Focus manually on a distant lighthouse or light source using live view zoom.
These settings form the backbone of most dock light photography sessions. The key is patience — review each shot on your LCD, check the histogram, and adjust accordingly.
Intermediate: Mastering Light Trails and Reflections
Once you are comfortable with the basics, it is time to explore more creative harbour light painting techniques:
- Intentional light trails: Extend exposure to 30 seconds or use a low ND filter to capture the smooth movement of boat lights and harbour traffic across the water.
- Water surface blending: Take multiple exposures of the water (shorter) and the lights (longer), then blend them in post-production for a balanced final image.
- Bracketing for dynamic range: Shoot 3–5 bracketed exposures to recover both highlight detail in light sources and shadow detail in dark corners of the harbour.
Advanced: Refining Your Seaport Light Photography Workflow
Advanced photographers push harbour light photography further with precision techniques:
- Focus stacking: Combine multiple focal points — foreground dock details, mid-range water, and background lighthouse — for tack-sharp images from edge to edge.
- Exposure blending: Merge differently exposed frames to handle extreme dynamic range between bright beacons and dark stone walls.
- Time-lapse harbour sequences: Compile hundreds of exposures into a smooth video showing light transitions across a working port.
- Colour grading for mood: Push cool tones in shadows and warm tones in highlights to enhance the dramatic contrast of a night harbour.
Best Conditions and Locations for Harbour Light Photography

Timing and location are everything in port light photography. The most dramatic harbour images often come from specific windows of opportunity:
- Blue hour (20–40 minutes after sunset): The sky retains a deep blue that contrasts beautifully with artificial harbour lights.
- Foggy or misty nights: Atmospheric haze diffuses light sources into soft, glowing orbs — perfect for moody harbour scenes.
- Light wind days: Calm water creates mirror-like reflections that double the visual impact of every light source.
- Low tide: Exposes more foreground elements — wet dock planks, seawalls, and anchored boats — adding depth and texture.
Iconic locations for coastal lighthouse photography include the harbours of Dover, Portofino, San Francisco, Sydney, and Edinburgh’s Newhaven. Each offers unique architectural light subjects and varying water conditions that suit different creative goals.
Comparing Camera Settings for Harbour Light Conditions
The table below compares recommended camera settings for harbour light photography across three common lighting scenarios:
| Condition | ISO | Aperture | Shutter Speed | ND Filter | Focus Mode |
| Full darkness, lighthouse beam only | 100–200 | f/11 | 15–30 sec | None | Manual |
| Blue hour harbour glow | 200–400 | f/8 | 5–10 sec | 3-stop | Manual |
| Twilight with residual sky light | 100–200 | f/16 | 2–5 sec | 6-stop | Manual |
| Foggy night, diffused lights | 400–800 | f/8–f/11 | 8–15 sec | None | Manual |
These values serve as a starting point. Every harbour is different — light pollution levels, water reflectivity, and atmospheric conditions all influence your final settings. Always bracket your exposures to give yourself flexibility in post-processing.
Post-Processing Tips for Harbour Light Images
Editing is where harbour light photography truly comes alive. Here are expert-level tips for refining your coastal light images:
- Recover highlights first: Pull down highlight sliders to retain detail in bright lighthouse beams and dock lamps before adjusting anything else.
- Lift shadows selectively: Use radial filters to brighten foreground dock elements without affecting the glow of background lights.
- Desaturate selectively: Reduce overall saturation by 10–15%, then add it back specifically to warm tones in light sources and cool tones in water reflections.
- Sharpen water texture: Apply targeted sharpening to water surfaces to enhance the contrast between calm reflections and any remaining wave motion.
- Remove sensor dust spots: Harbour environments are dusty and salty — check for spots on the sensor, especially on dark water areas.
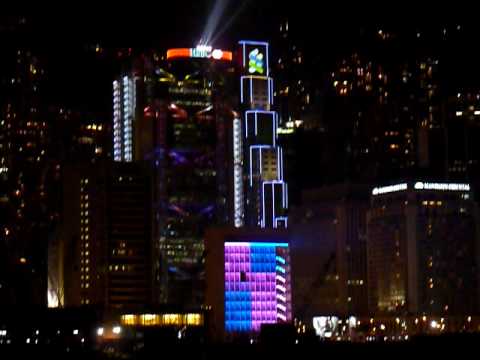
Software like Adobe Lightroom, Capture One, and Affinity Photo all handle maritime photography editing effectively. The key is restraint — over-editing can make harbour images look artificial and strip away the natural atmosphere that makes them compelling in the first place.
Common Mistakes to Avoid in Harbour Light Photography
Even experienced photographers fall into traps when shooting seaport light photography. Watch out for these pitfalls:
- Ignoring white balance: Sodium-vapor harbour lights cast a warm orange hue. Setting your white balance to tungsten or manually adjusting it prevents muddy, over-warm tones that are difficult to correct later.
- Using too narrow an aperture (f/22+): Diffraction at very small apertures softens your entire image. Stay within the sharpest range of your lens, typically f/8–f/14.
- Forgetting the foreground: A harbour image without an interesting foreground element — rusted railings, mooring posts, or wet stone — feels flat. Always compose with depth.
- Shooting too late into the night: After full darkness, harbour light photography loses its sky context, which provides essential contrast and colour to the scene.
Final Thoughts on Mastering Harbour Light Photography
Harbour light photography rewards persistence, patience, and a genuine love for coastal atmospheres. Every lighthouse beam tells a story, every dock lamp reflects a piece of human history, and every long exposure transforms moving water into silk-like textures that transform ordinary ports into extraordinary images. By building your skills progressively — starting with basic manual settings, advancing through creative light painting, and finally refining your workflow with advanced post-processing — you will develop the topical authority and technical confidence to produce work that stands out in the competitive world of maritime and coastal photography.
Pack your tripod, scout your local harbour, and return again and again. The best harbour light photography results come not from a single perfect night, but from dozens of patient sessions where you learn to read the light, the water, and the mood of each unique waterfront scene.
Frequently Asked Questions (FAQs)
What is the best time of day for harbour light photography?
The optimal window for harbour light photography is during blue hour — roughly 20 to 40 minutes after sunset — when there is enough residual sky light to create contrast against artificial harbour illumination while the lights themselves become the dominant visual element.
Do I need an expensive camera for harbour light photography?
No. While full-frame cameras with excellent high-ISO performance help, many photographers achieve stunning lighthouse long exposure tips results with APS-C or even micro four-thirds cameras. The tripod, ND filters, and your technique matter far more than the camera body.
What ND filter is best for shooting harbour lights at twilight?
A 3-stop ND filter works well during blue hour when there is still ambient light, while a 6-stop or 10-stop ND filter is ideal for pure darkness when you want to push shutter speeds to 30 seconds or longer for smooth water effects.
How can I reduce noise in my harbour night photos?
Keep your ISO as low as possible (100–400), use the longest shutter speed your scene allows, and shoot in RAW format so you have maximum flexibility for noise reduction during post-processing without sacrificing shadow detail.
What makes a harbour light photograph stand out from a regular seascape?
The distinguishing factor is the interplay between artificial light sources and water reflections. A great harbour light photography image uses illuminated structures, boat lights, and dock lamps to create layers of colour, contrast, and narrative that a generic seascape lacks.