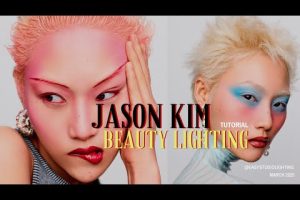



Hard light photography is one of the most transformative techniques a photographer can master. Whether you are capturing portraits, products, or cinematic landscapes, understanding hard light gives you the power to shape mood, texture, and dimension in ways that soft light simply cannot replicate. If you have ever noticed how sunlight streaming through a window creates sharp, defined shadows on a face or how a bare studio strobe carves dramatic highlights into a subject, you have already encountered hard light in action. This guide dives deep into what hard light photography is, how it works, when to use it, and how you can start applying it to elevate your images immediately.
What Is Hard Light Photography?
Hard light refers to a lighting condition where the light source appears relatively small or distant compared to the subject, producing sharply defined shadows with high contrast between the illuminated and shadowed areas. The term “hard light” comes from the way shadows transition abruptly from bright to dark, without a soft gradient or penumbra. In practical photography terms, hard light reveals texture, emphasizes geometric shapes, and creates a sense of drama or intensity that draws the viewer’s eye directly into the frame.
Many photographers associate hard light with challenging conditions, but it is actually one of the most intentional and controlled lighting choices available. From the harsh midday sun to a bare off-camera flash, hard light sources are everywhere once you know how to recognize and work with them.
Hard Light vs Soft Light: Understanding the Difference
The most fundamental distinction in photography lighting is between hard light and soft light. Soft light wraps around subjects, producing gradual shadow transitions and minimizing surface texture. Hard light does the opposite — it casts crisp edges on shadows, highlights every bump and contour, and creates a bold, graphic quality in the image. Below is a direct comparison of the two lighting types:
| Attribute | Hard Light | Soft Light |
| Shadow Edge Quality | Sharp, well-defined | Gradual, feathered |
| Contrast Level | High | Low to moderate |
| Texture Emphasis | Strong, reveals details | Minimal, smooths surfaces |
| Shadow Direction | Single direction, crisp | Diffuse, multi-directional |
| Best For | Dramatic portraits, product shots, editorial | Beauty, newborn, lifestyle |
| Light Source Size (relative to subject) | Small or distant | Large or close |
A useful rule of thumb is that the relative size of the light source compared to the subject determines whether light behaves as hard or soft. A small bare flash positioned far from a person creates hard light. The same flash inside a large softbox placed close to the subject produces soft light. This principle applies regardless of the actual physical size of the light source.
How Hard Light Is Created
Creating hard light is straightforward because it is essentially the default state of most unmodified light sources. When a light has no diffusion, modifier, or bounce surface between it and the subject, it produces hard shadows with defined edges. Here are the primary ways photographers generate hard light in real-world shooting situations.
Natural Hard Light Sources

Nature provides some of the most powerful hard light sources available. The midday sun is the classic example — because it is so far away relative to Earth, it behaves as a small, directional point source that casts razor-sharp shadows. Other natural hard light scenarios include direct sunlight filtered through a narrow gap, such as a doorway or tree canopy, which concentrates the light into a narrow beam with minimal diffusion. Overcast skies rarely produce hard light, which is why many photographers consider clear-sky midday the ideal hard-light condition.
Artificial Hard Light Setup
In the studio or on location, creating hard light requires removing diffusion and keeping the light source compact. Common setups include:
- Bare speedlight or strobe without a modifier
- Standard reflector attached to a flash head
- Grid spots or snoots that narrow the beam
- Direct sunlight streaming through a window with no curtain
- Small LED panels set to a narrow beam angle
The key is to avoid any diffusion material such as softboxes, umbrellas, or scrims that would scatter the light and soften the shadow edges.
When to Use Hard Light Photography
Hard light is not universally applicable, but when used intentionally, it becomes an incredibly powerful storytelling tool. Understanding the right scenarios for hard light helps you make confident creative decisions on every shoot.
Hard Light Portraits
Contrary to popular belief, hard light can produce stunning portraits when used with purpose. It sculpts facial features, emphasizes bone structure, and adds a sense of grit or raw emotion that soft light often smooths away. Editorial fashion photographers and fine art portraitists frequently rely on hard light to create images with strong visual impact. The key is positioning the light at an angle that flatters the subject’s features — typically a 45-degree offset or a Rembrandt-style setup where one side of the face is lit while the other falls into shadow.

Product Photography with Hard Light
Product photographers use hard light to highlight textures, surface finishes, and material details. A hard light source grazing across a textured surface reveals every ridge, groove, and imperfection in a way that makes the product feel tangible and three-dimensional. Jewelry, leather goods, and architectural elements all benefit from the contrast and definition that hard light provides.
Cinematic and Dramatic Scenes
Filmmakers and photographers who want to evoke tension, mystery, or intensity turn to hard light. Think of classic noir cinema, where a single hard source creates deep shadows across a character’s face. In photography, the same approach works for mood-driven editorial work, music portraits, and conceptual storytelling where drama is the primary goal.
Equipment and Gear for Hard Light

You do not need expensive equipment to create compelling hard light. In fact, some of the most iconic hard-light images were captured with minimal gear. Here is a breakdown of the core tools:
- Speedlights and Strobes — A bare flash unit is one of the most accessible hard light sources. Mono-block strobes with a standard reflector offer even more power and control.
- Reflectors — A standard white or silver reflector attached to a flash head concentrates the light into a directional beam without diffusion.
- Grids and Snoots — These accessories narrow the spread of light, creating a focused beam that produces even harder shadow edges and more localized illumination.
- Flags and Barn Doors — Used to block or shape the light, flags help you control exactly where the hard light falls on your subject and background.
- Natural Light with Reflectors — A simple reflector can bounce hard sunlight onto a shadow side of the subject while maintaining the sharp shadow quality on the opposite side.
Advanced Techniques for Mastering Hard Light
Once you understand the basics, layering advanced techniques into your hard light workflow dramatically expands your creative range. These methods separate good hard-light photographers from truly exceptional ones.
Feathering the Light
Feathering involves rotating the light source so that the edge of the beam, rather than the center, hits the subject. This technique reduces the overall intensity while maintaining the hard shadow quality. Feathering is especially useful for portrait work because it softens the harshest highlights on the skin while preserving the dramatic shadow structure.
Using Flags and Negative Fill
Flags are opaque panels placed on the shadow side of the subject to deepen the contrast even further. By blocking any ambient or reflected light from filling the shadows, you maintain the stark, high-contrast look that defines hard light photography. Negative fill — using black cards or dark surfaces — achieves the same effect in natural light setups.
Mixing Hard and Soft Light
Advanced photographers often combine hard and soft sources in a single frame. For example, a hard key light creates dramatic shadows on one side of the face, while a large, dimly lit soft fill source on the opposite side opens the shadows just enough to retain detail. This hybrid approach gives you the best of both worlds — drama and dimensionality with enough shadow recovery to keep the image balanced.
Expert Tips for Hard Light Photography
Drawing from years of professional experience, here are practical tips that will help you get the most out of hard light:
- Watch your angles. Hard light is unforgiving — a slightly wrong angle can create unflattering shadows on the face or body. Always test your position before the final shot.
- Use the environment. Walls, ceilings, and reflective surfaces can bounce hard light and create secondary shadows that add depth and complexity to the scene.
- Expose for the highlights. Hard light creates bright highlights that clip easily. Protect your highlights first and recover shadow detail in post-processing.
- Embrace the shadows. Do not try to eliminate every shadow. The shadow is the signature of hard light — it is what gives the image its character and mood.
- Shoot during golden hour with direct sun. The low angle of the sun creates long, dramatic hard shadows that add depth and storytelling power to outdoor portraits and landscapes.
- Practice with one light only. Before adding complexity, master the art of a single hard light source. This builds your eye for shadow placement and contrast control.
Conclusion
Hard light photography is far more than a technical lighting choice — it is a creative language that communicates strength, drama, texture, and emotion. Whether you are working with the unforgiving midday sun, a bare studio strobe, or a focused grid spot, understanding how to create and control hard light puts you in complete command of the mood and visual impact of your images. Start by practicing with a single, unmodified light source, study the shadows it creates, and experiment with positioning until the light begins to feel like an extension of your artistic vision. With patience and intentional practice, hard light will become one of the most powerful tools in your photographic arsenal.
Frequently Asked Questions
What is hard light in photography, and how is it different from soft light?
Hard light is produced by a relatively small or distant light source that creates sharp-edged, well-defined shadows with high contrast. Soft light, on the other hand, comes from a larger or closer source and wraps around the subject with gradual shadow transitions and reduced contrast.
How do you create hard light for portrait photography?
Use a bare flash or strobe without any diffusion modifier, position a standard reflector on the light head, or rely on direct sunlight without any obstruction. Keeping the light source small relative to the subject and maintaining distance ensures the hard shadow quality remains intact.
Is hard light bad for portrait photography?
Not at all. Hard light can be incredibly flattering for portraits when used intentionally. It sculpts facial features, emphasizes bone structure, and adds a raw, dramatic quality that many photographers and subjects prefer for editorial and fine art work.
What gear is needed for hard light photography?
At minimum, you need a flash unit or strobe with a standard reflector. Adding a grid or snoot gives you more control over the beam spread, while flags and barn doors help shape the light and deepen contrast. Even natural sunlight with no diffusion works as a powerful hard light source.
Can you mix hard light with soft light in the same setup?
Yes, and many professional photographers do this regularly. A hard key light creates dramatic shadows and highlights, while a large, dimmed soft fill source on the opposite side opens the shadows just enough to retain detail. This hybrid approach balances drama with usable shadow recovery.
What time of day provides the best hard light outdoors?
Midday on a clear day produces the hardest natural light because the sun is directly overhead and behaves as a small, distant point source. During golden hour, the sun is lower, creating longer and more directional hard shadows that many photographers find especially dramatic and flattering.